Guide to Community Forms
In this article:
- Creating a community form on desktop or mobile
- Adding details to your form
- Finding your community form
- Fundraising with your community form
- Your fundraising statistics
- Downloading community form data
Community forms are a great way for supporters to organize their own networks and fundraise for candidates and causes they support!
Creating a Community Form on Desktop or Mobile
First, log in to your ActBlue account or create an account here. Having an ActBlue Express account makes it easy to donate to and build community forms for your favorite groups.
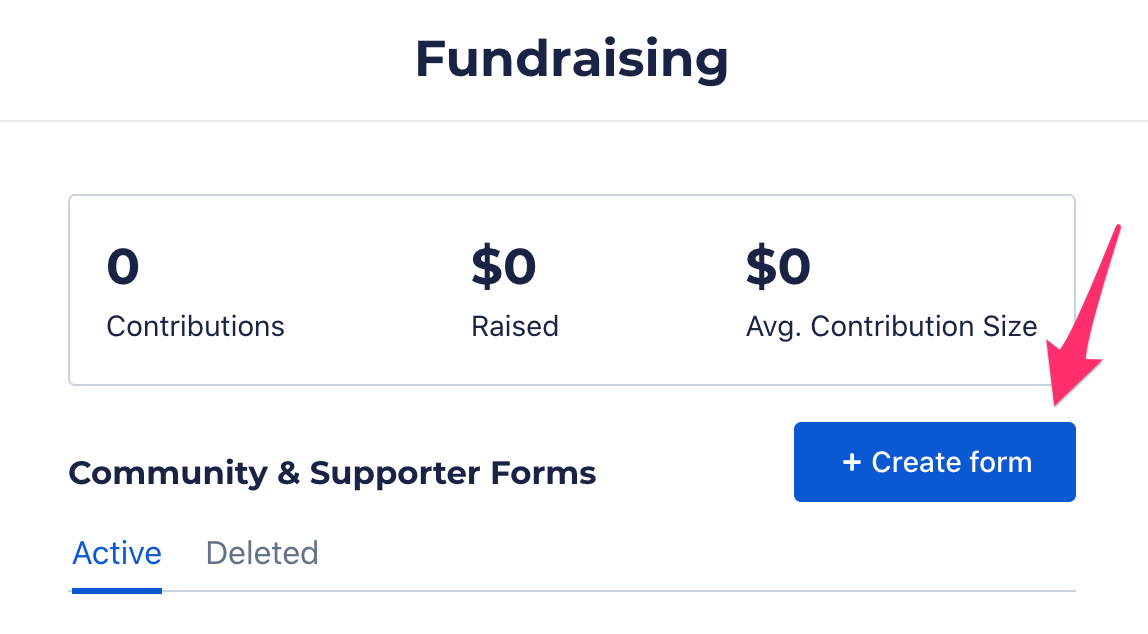
If you’re logged in on a desktop computer or laptop, click on “Fundraising” in the left navigation bar.

On your Fundraising page, you’ll find fundraising tools and a list of your supporter or community forms. Click the “Create form” button to build your community form.
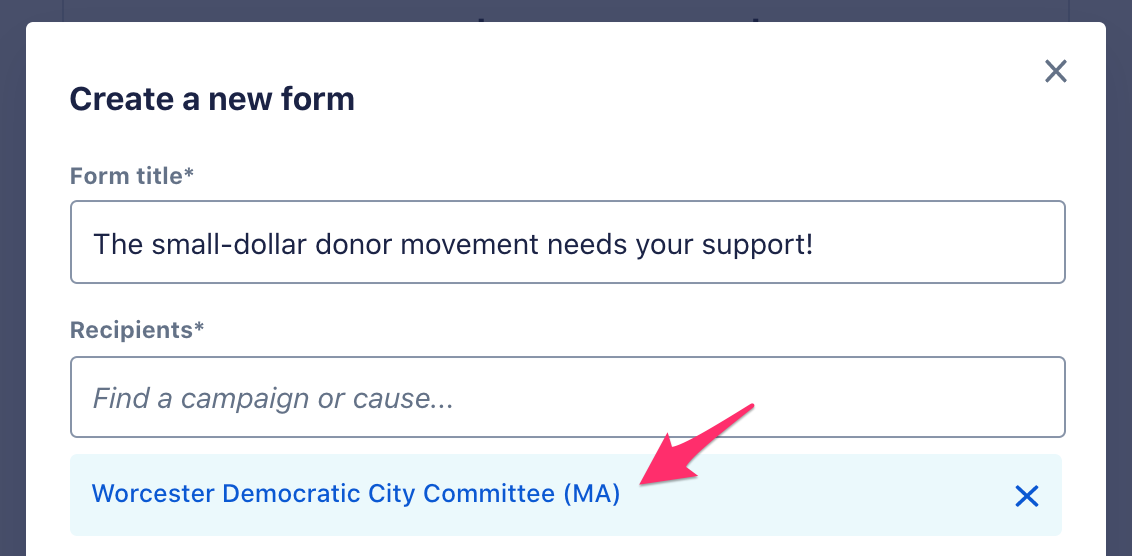
A pop-up will open where you will fill out your form’s basic information.
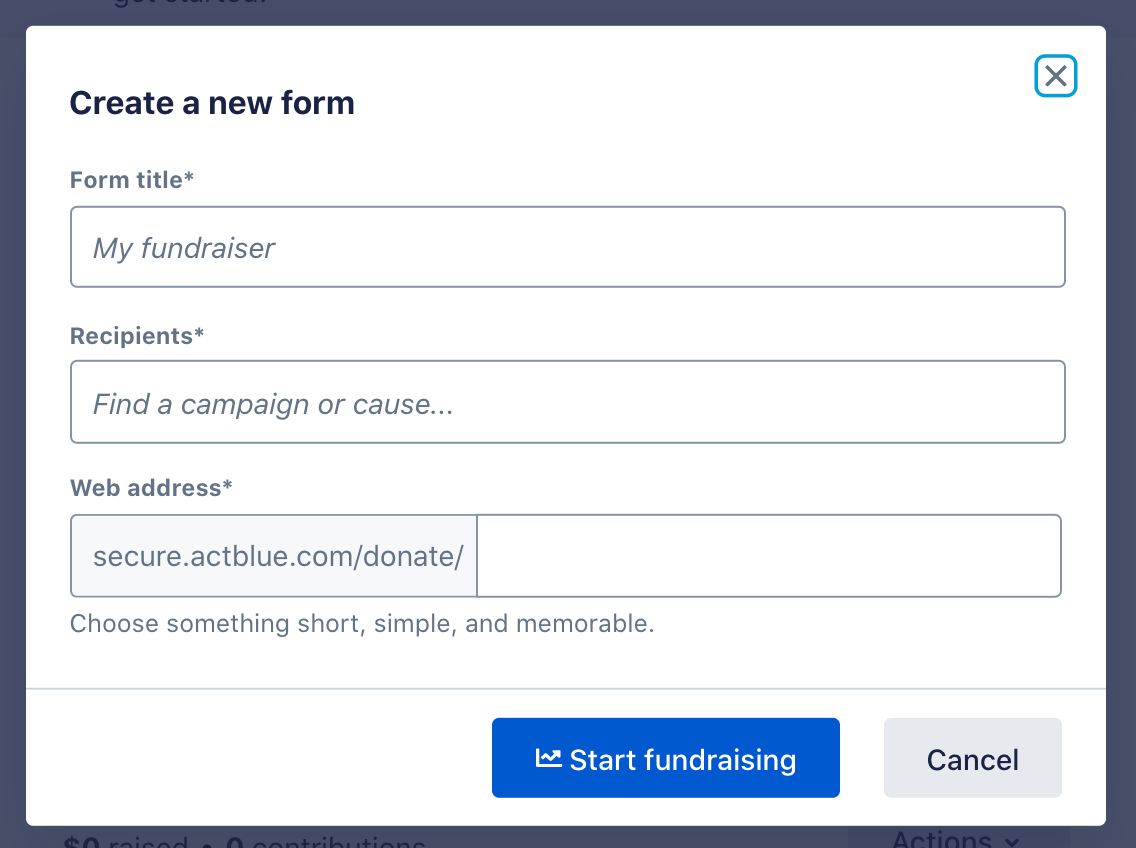
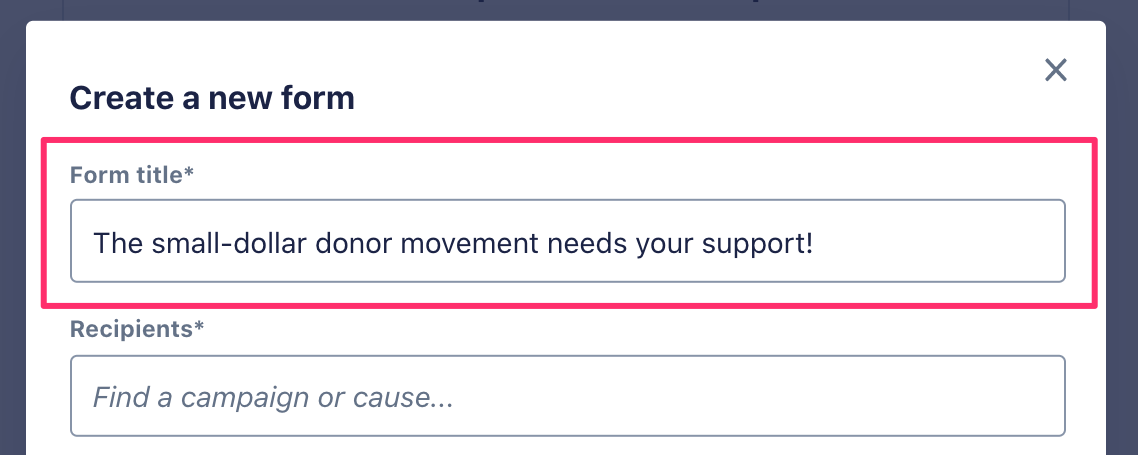
First, give your form a short and descriptive title. You can edit this later, so don’t worry if it is not perfect!
Next, add the recipient or recipients you would like to fundraise for by searching for the name of the group(s). Double check the name to confirm that you’re adding the correct campaign or organization!
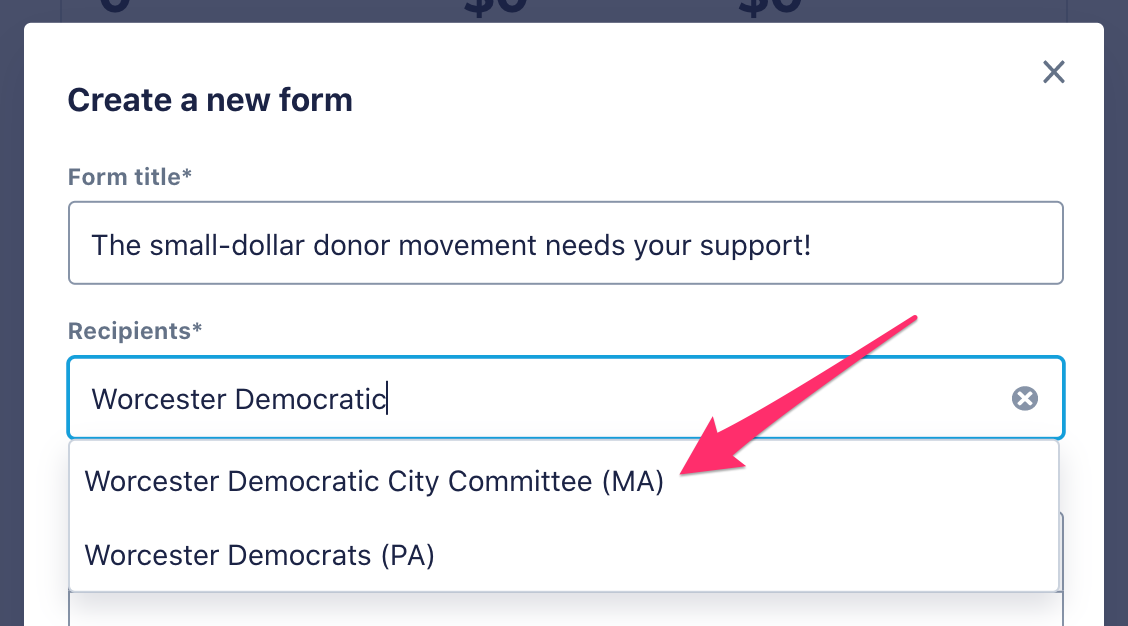
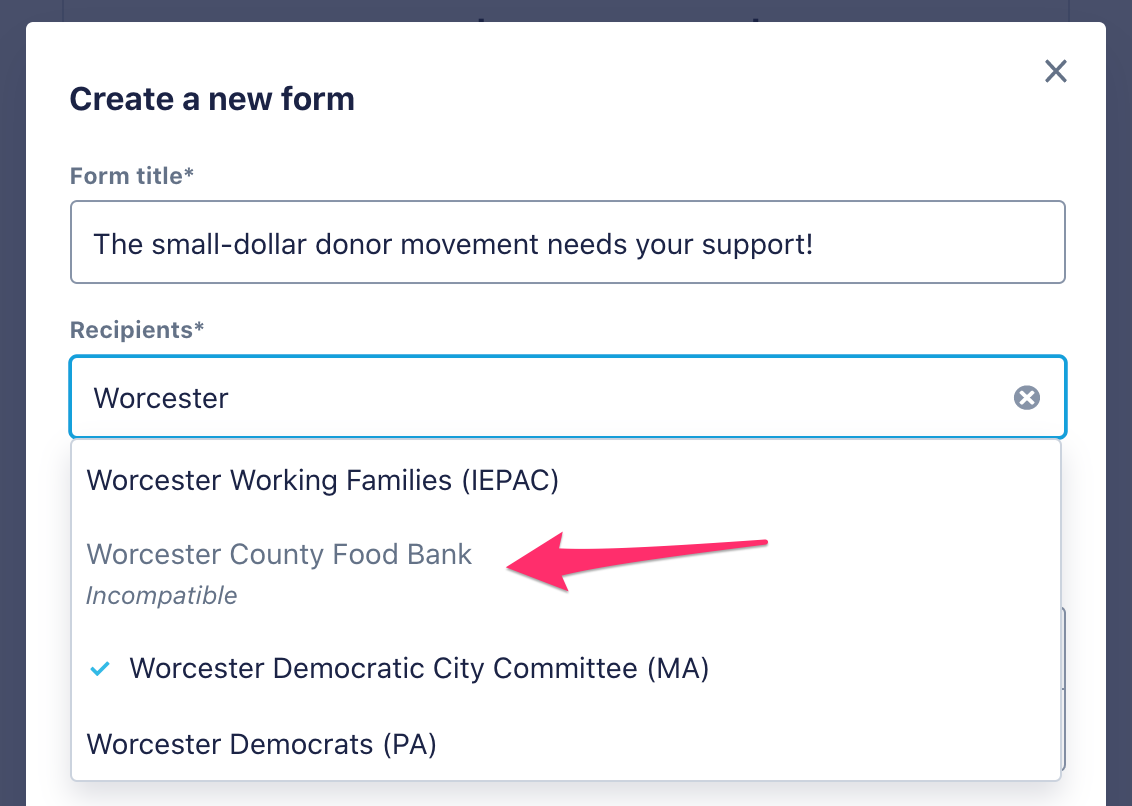
Please note that due to campaign finance law, certain groups cannot be on the same contribution form together. Once you add one recipient, we will point out in the dropdown what groups you cannot add as recipients on that particular form.
Finally, finish the web address for your form by typing a short, simple phrase in the “Web address” box.
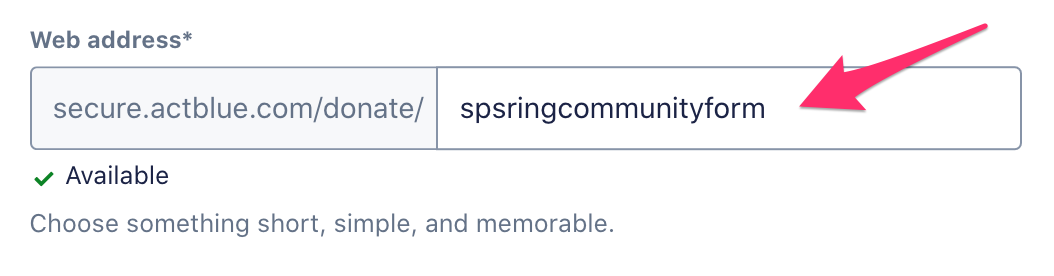
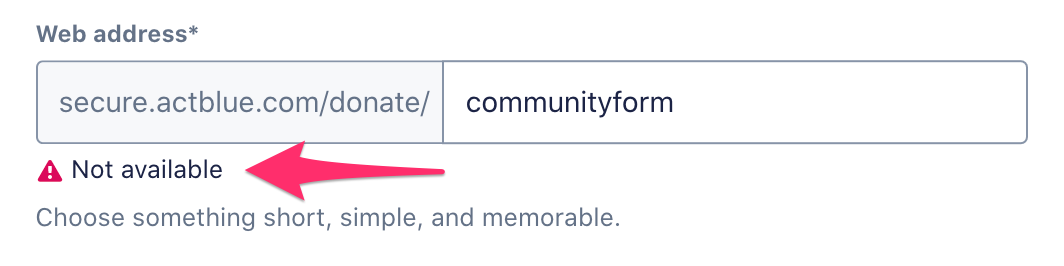
This phrase will be part of your form’s unique web address (URL). You will see “Not available” under the web address field if another form is already using it.
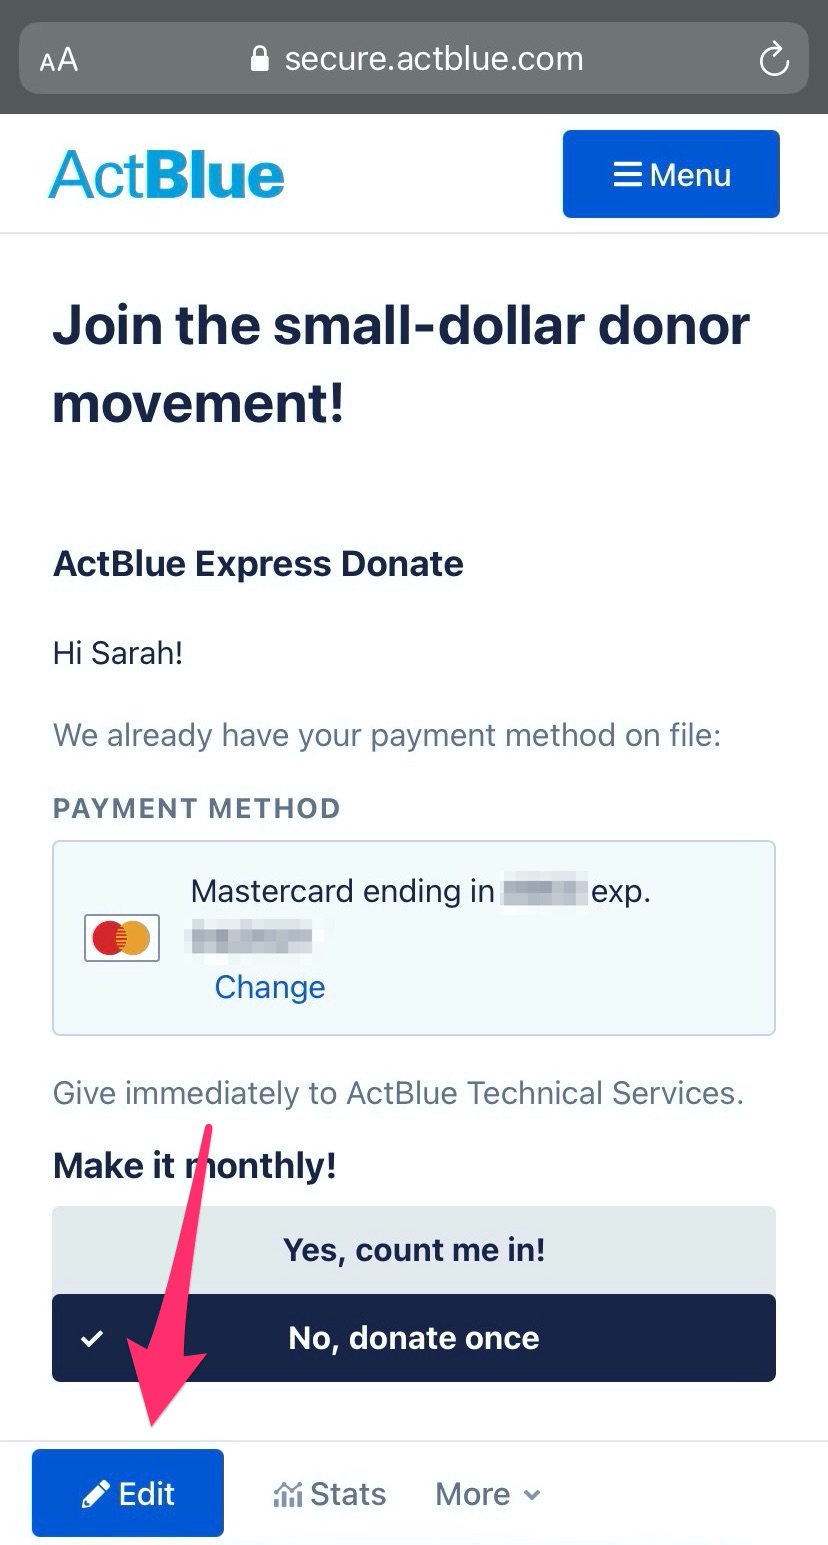
When you click “Start fundraising,” you will land on your Fundraising page, where you will see your new community form at the top of the list of your active forms. To open and edit your form, click the dropdown menu and select “Edit and Preview.” When your form opens, click the blue “Edit” button on the top left side of your screen.
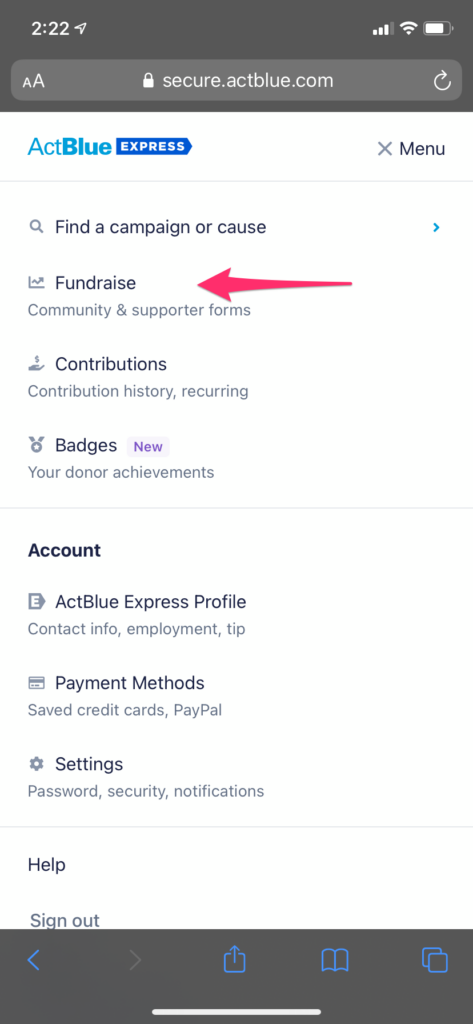
You can also easily create a community form on your mobile device. After logging into your ActBlue account, select “Fundraise” in the menu.
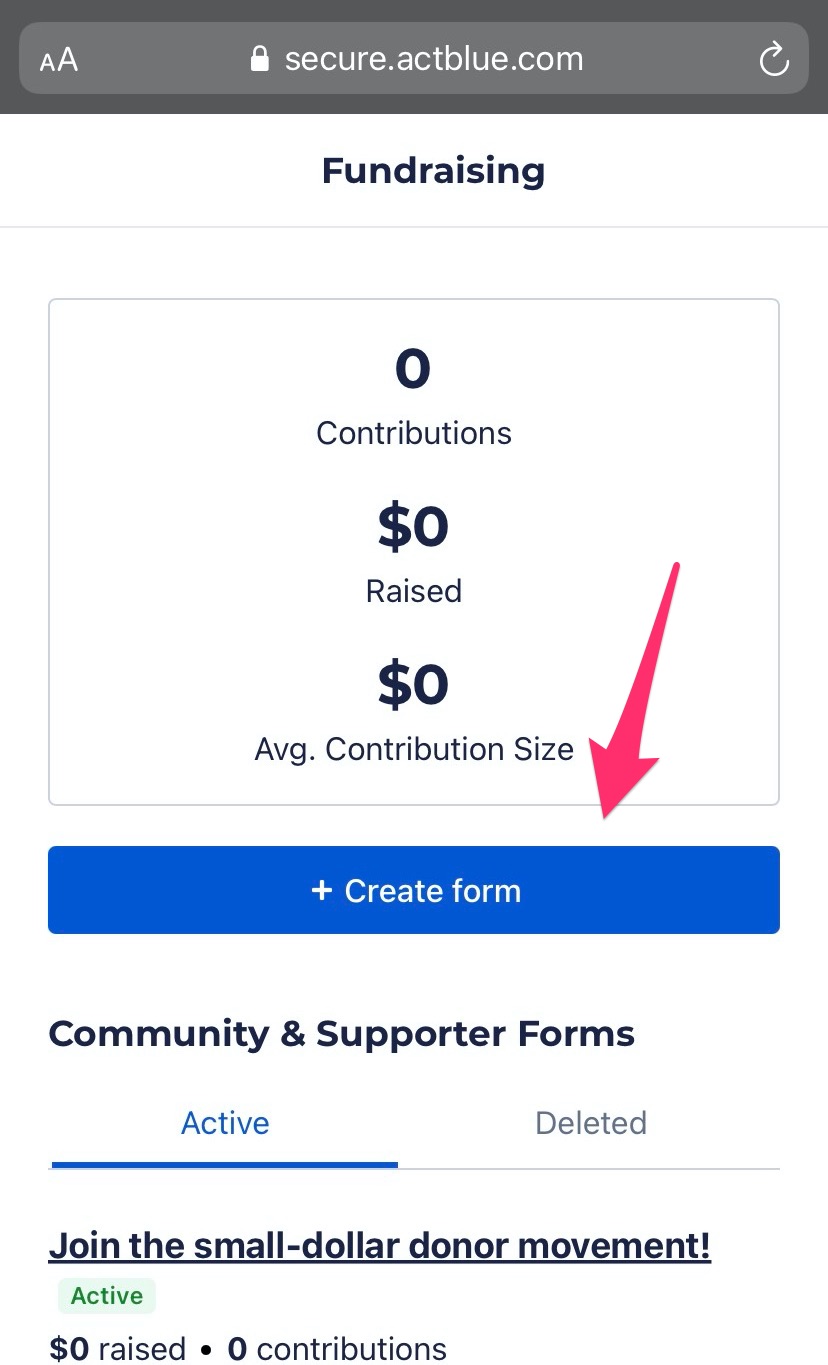
Press the “Create form” button in the middle of your screen.
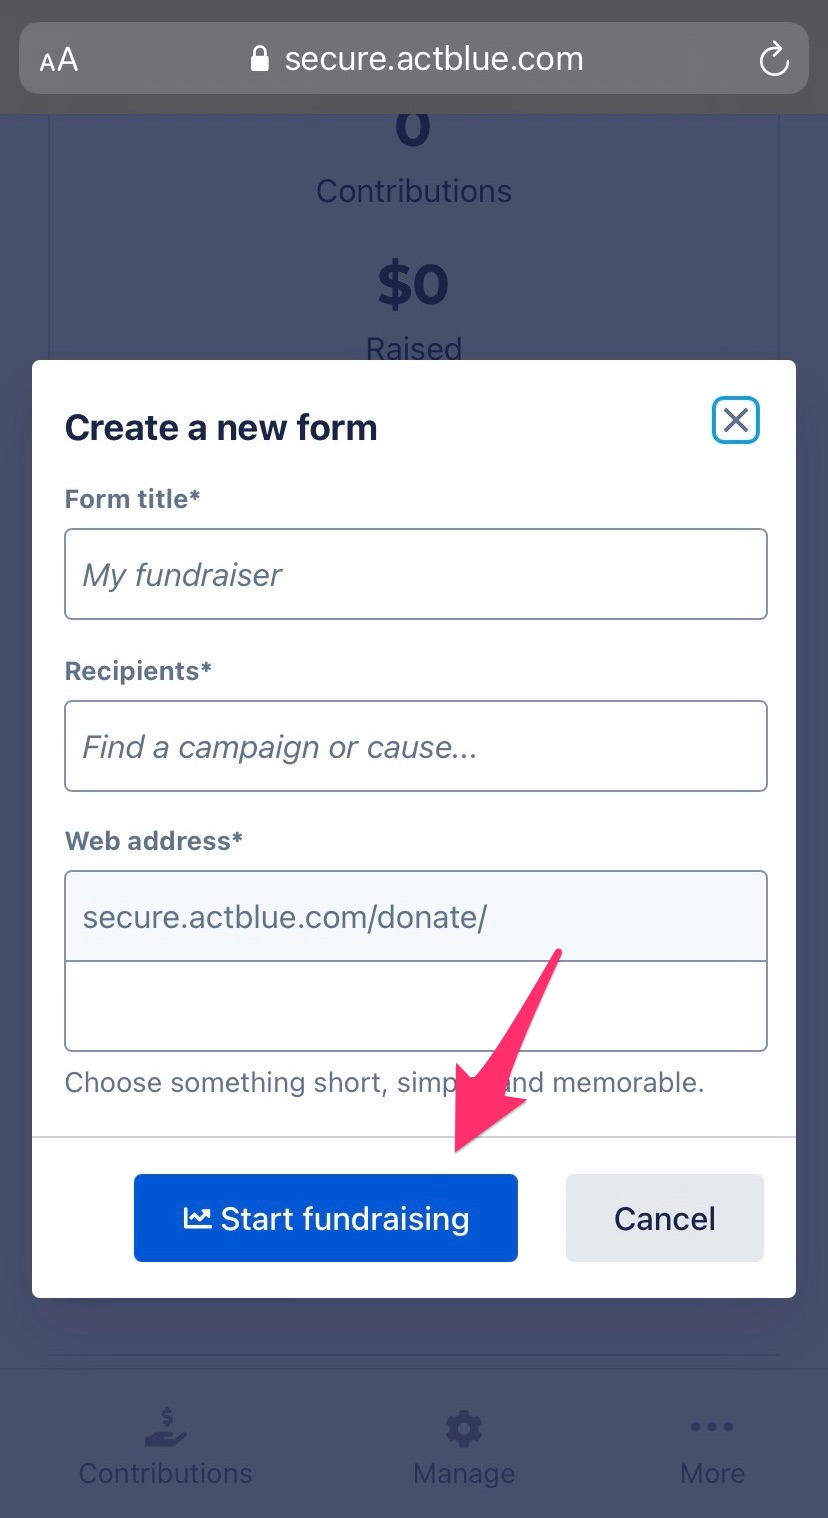
A pop-up will open where you can enter your form’s title, add one or more recipients, and create your form’s web address (URL). Once you’ve entered this information, press the “Start fundraising” button.
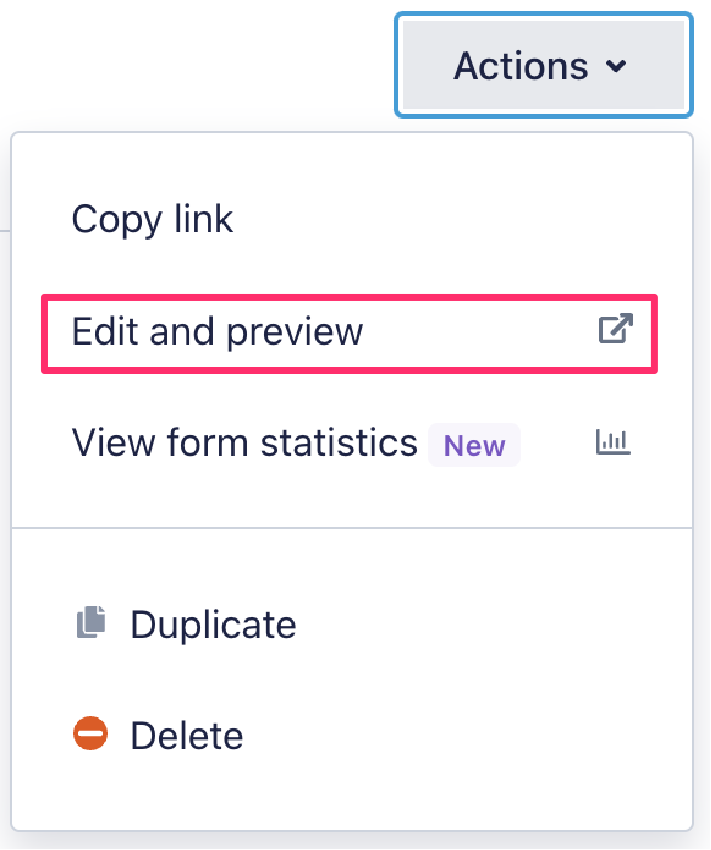
You’ll land on your Fundraising page, where your new community form should now be listed. Click on the “Actions” dropdown menu and select “Edit and preview” to open your form.

Click the blue “Edit” button to customize your form.
ActBlue users can also start a community form from the search results page. After logging in, use the search bar at the top left of your screen to find a specific candidate or organization by name. You can also filter by upcoming elections, state or territory, the office a candidate is running for, committee type, fund type (like nominee funds and draft funds), or nonprofit issue area.

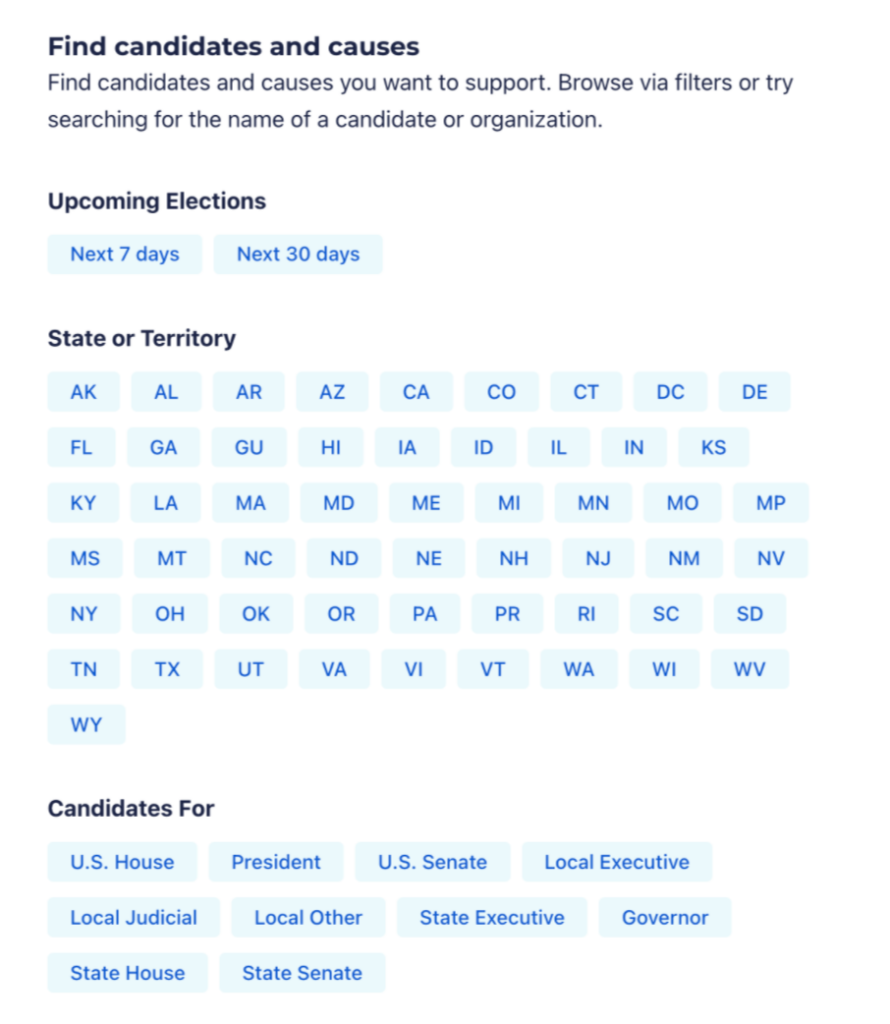

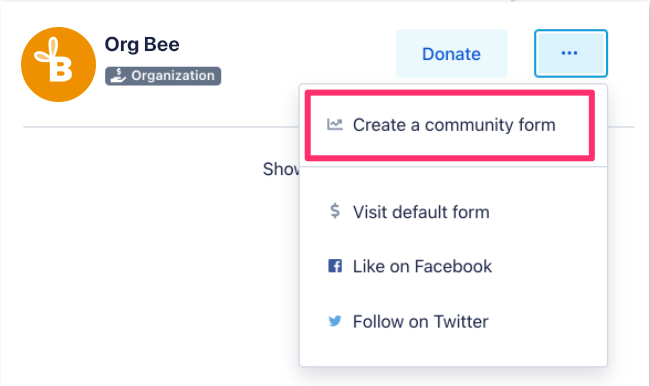
You can now create a community form directly from the search results.
Adding Details To Your Form
Now you can use the form editor to customize your form! Below are the elements we recommend editing to best connect with other grassroots donors.
1. Title, ask, and URL
The first thing you should do is add a donation ask. In the “Title, ask, and URL” tab of the form editor, write a short blurb explaining why someone should donate in the “Donation ask” box. Explaining why you’re invested in the cause will motivate your friends and family to give.
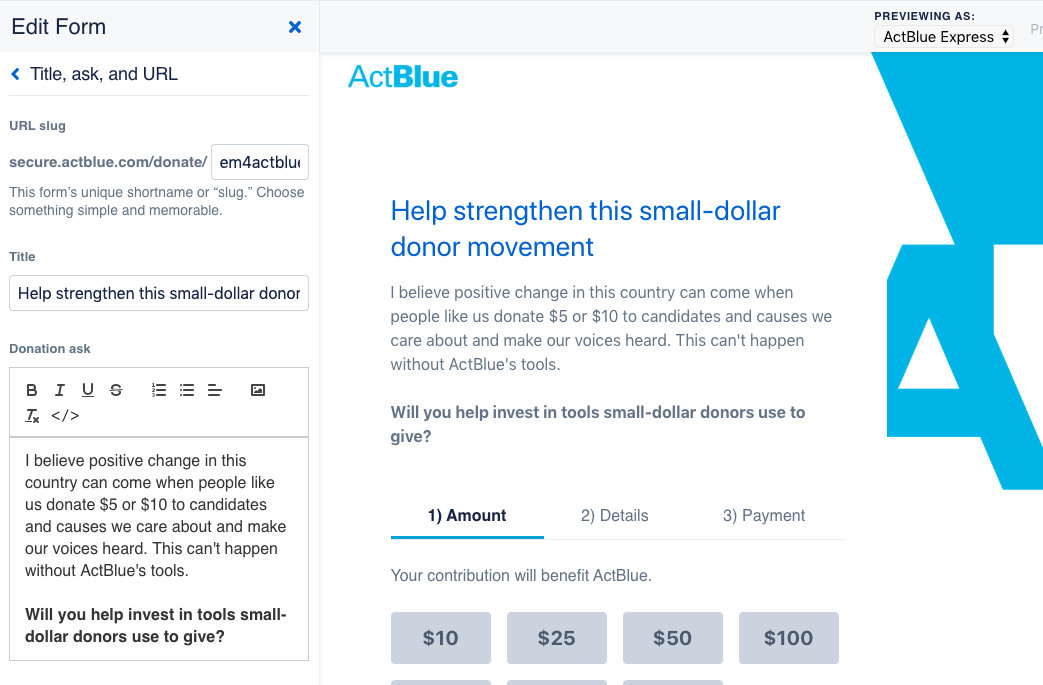
You can add basic formatting like bullet points and bolding text. If you want to add HTML, click the “</>” button before typing your code.
In the same tab, you can add videos and livestreams to a contribution form by clicking “Video URL,” and turning on “Feature video.” On forms with a featured video, supporters can watch and donate simultaneously, and after donating, they will stay on the form so they can continue to watch! This tool is great for hosting a virtual fundraising event for your community.
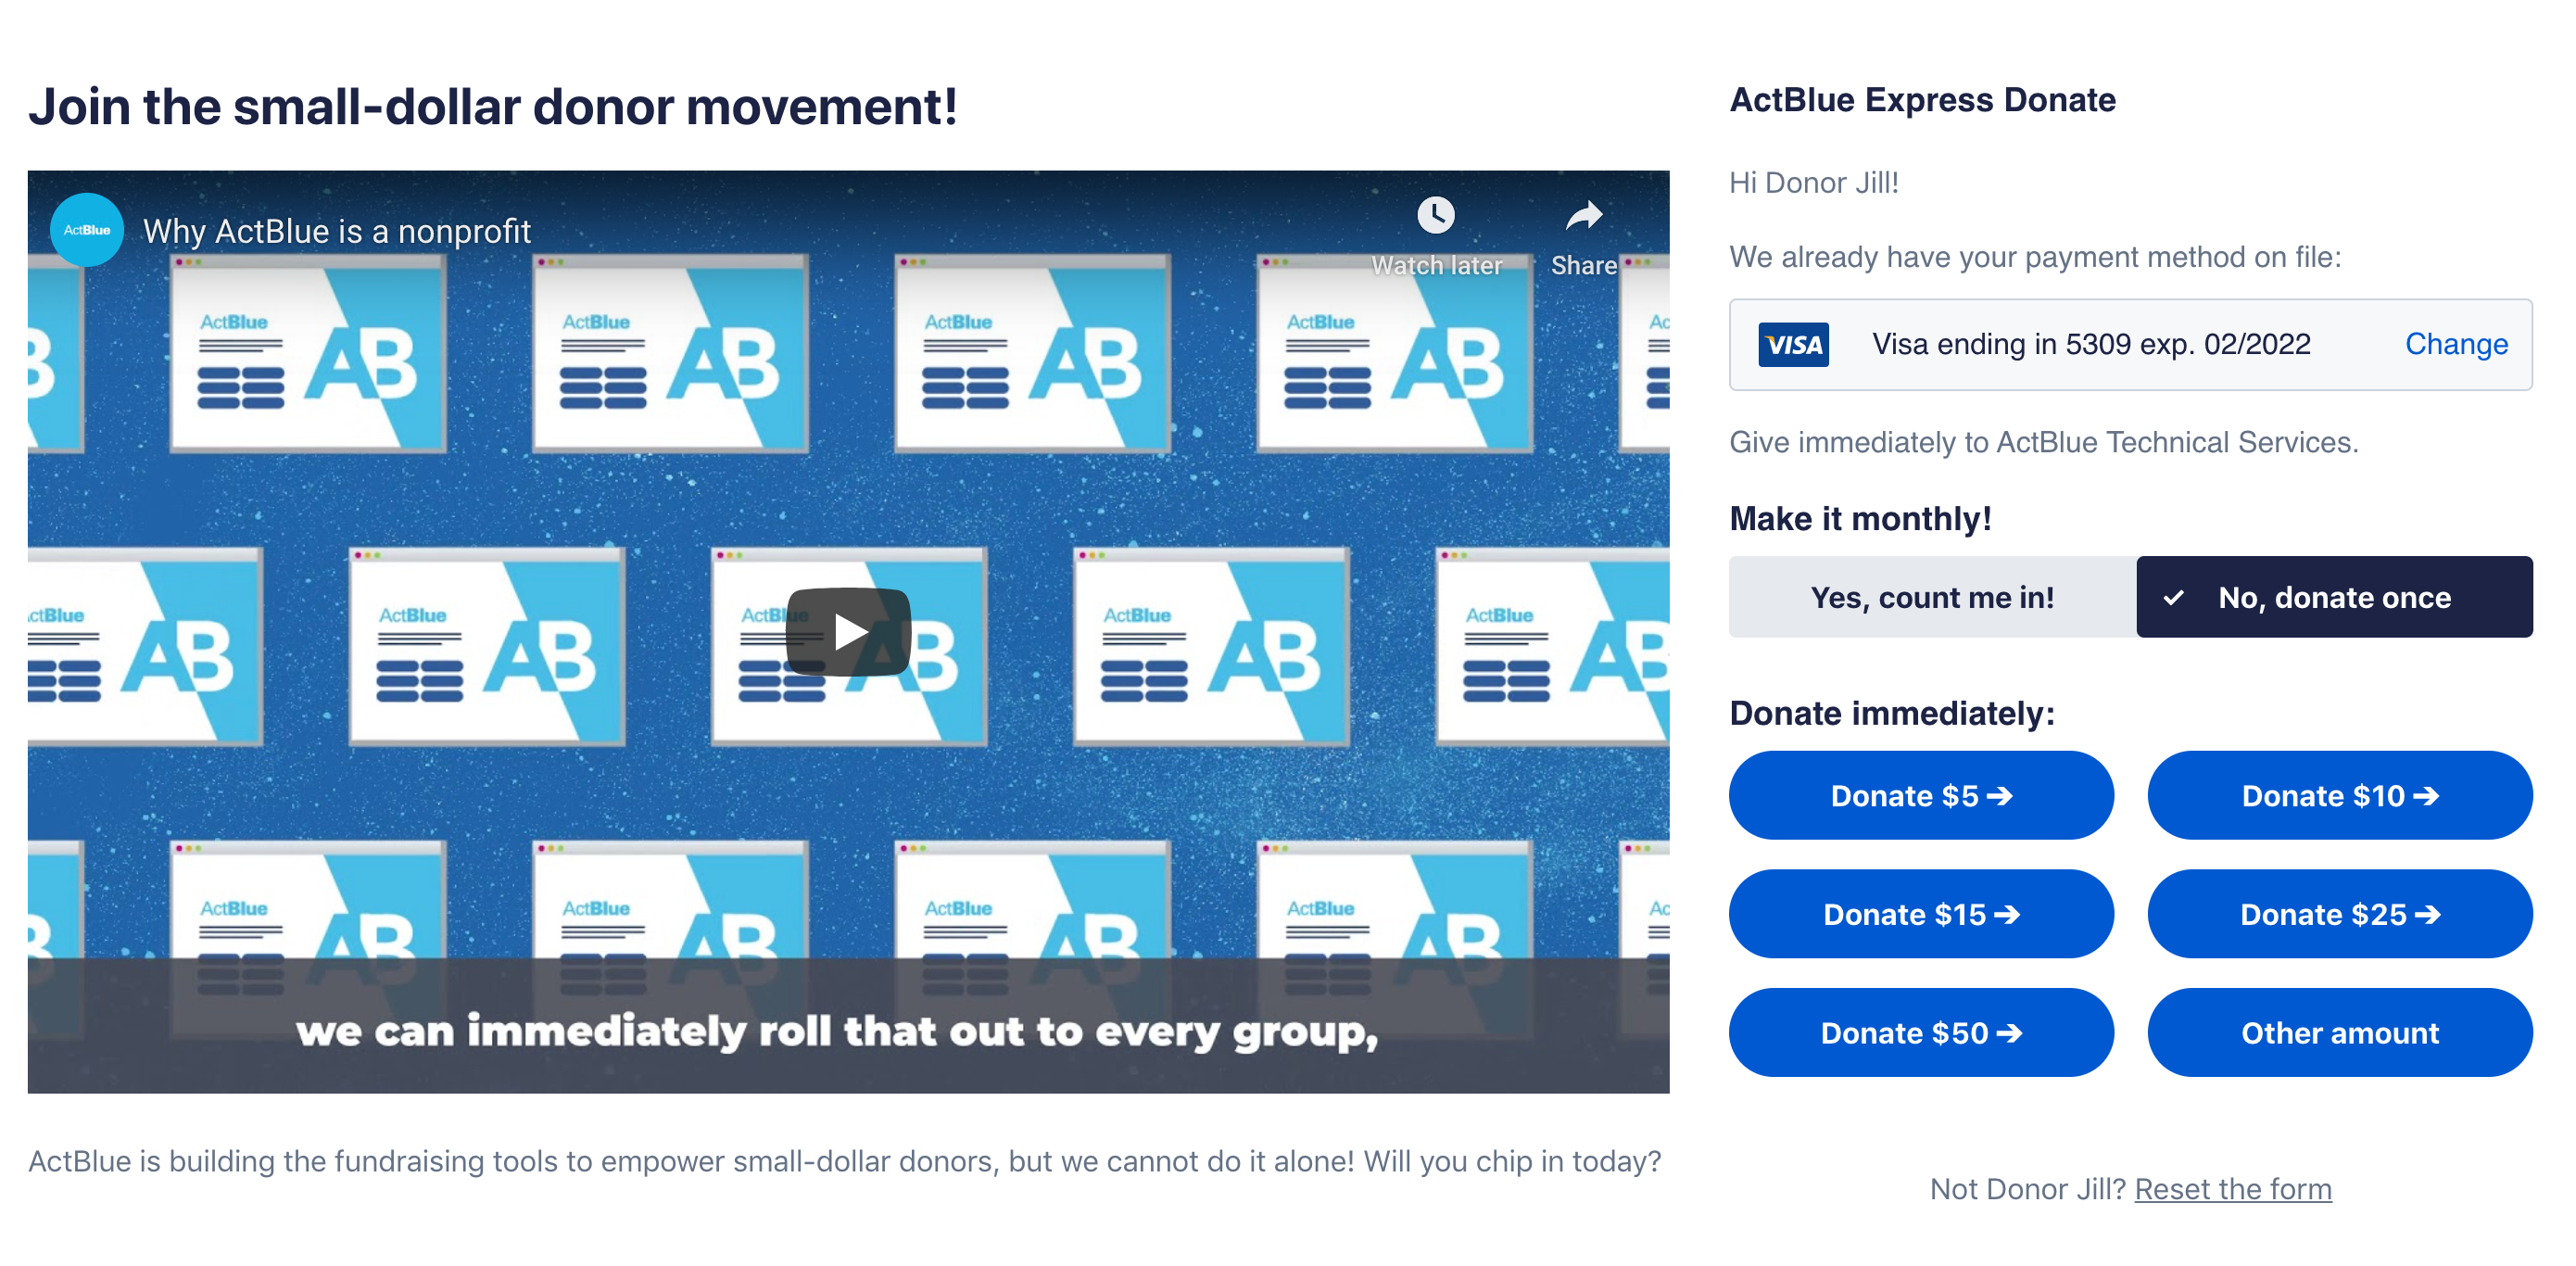
Click “Publish” and exit the form editor to preview your form with a featured video!
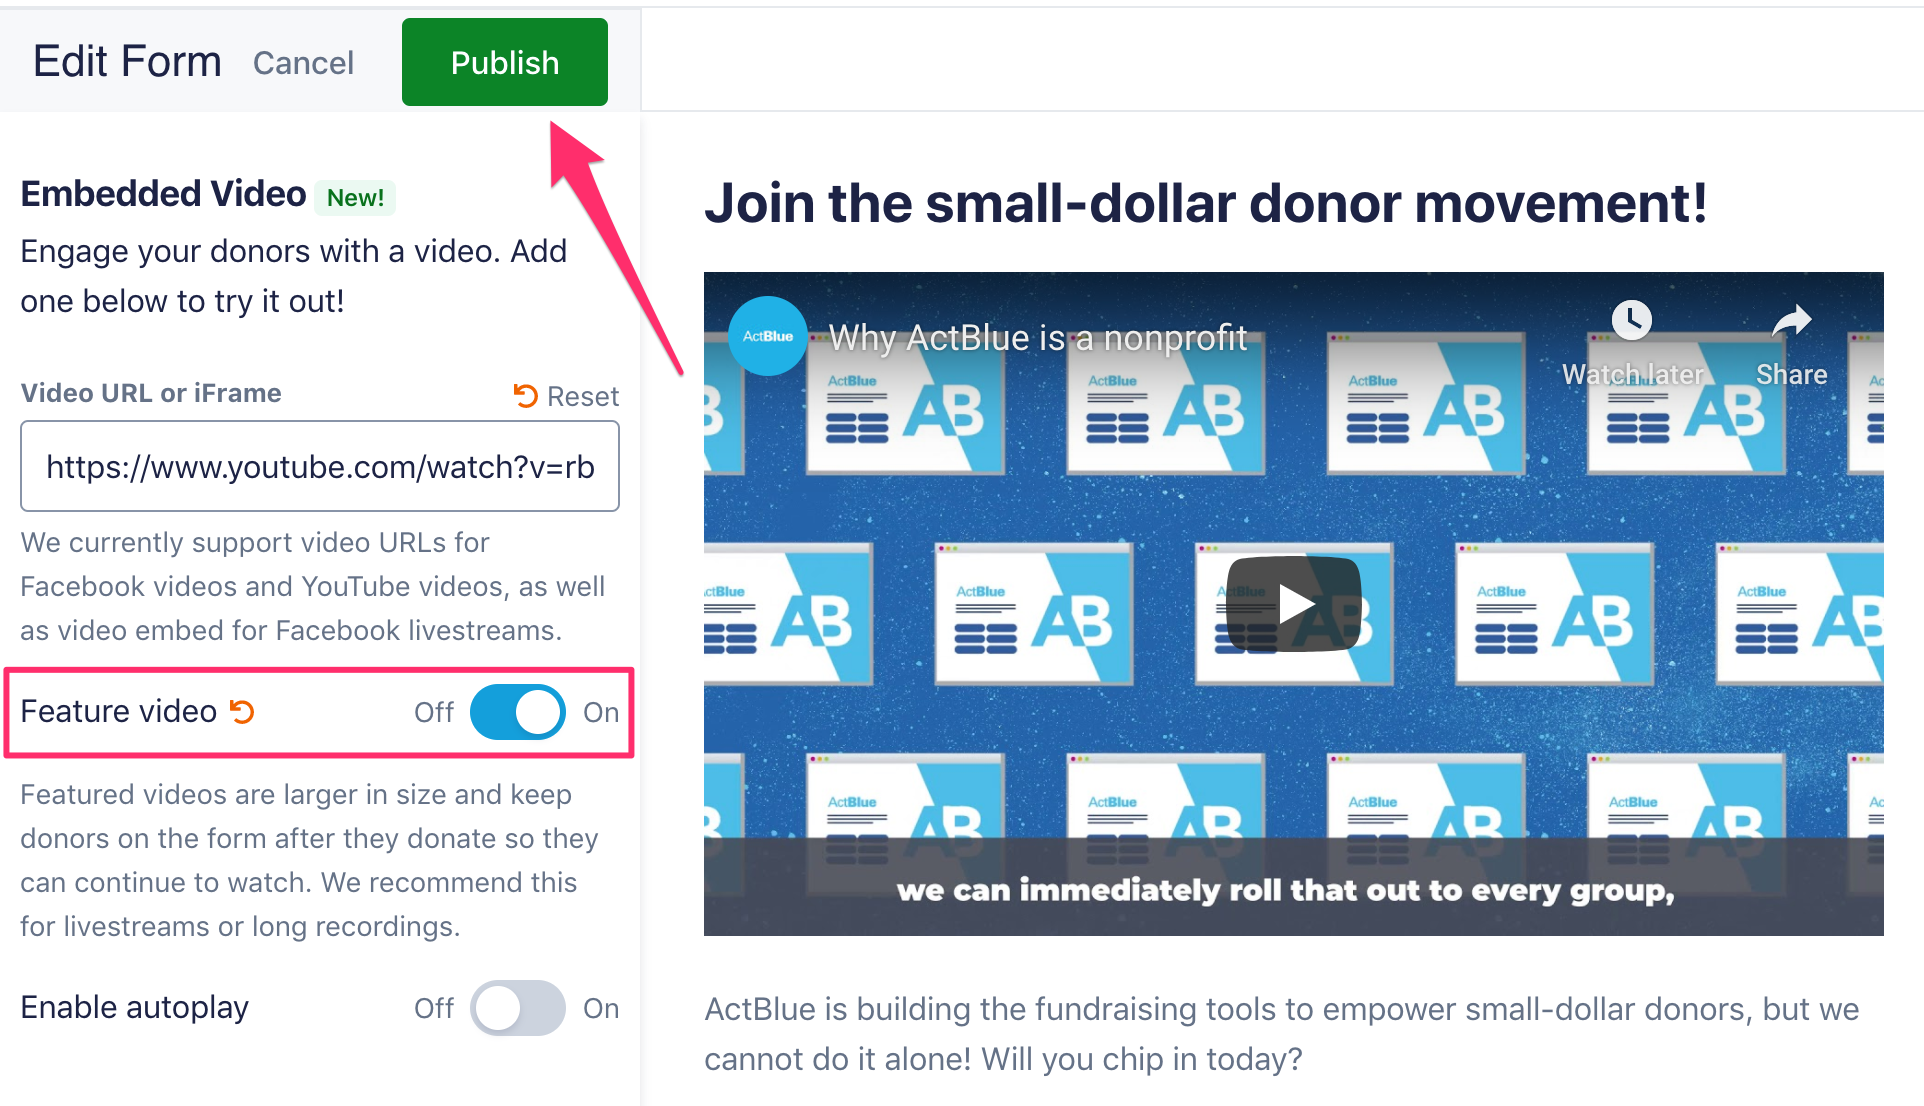
Click here to learn more about our featured video tool, including what types of videos and livestreams are supported.
2. Preset donation amounts
The next thing you should do is go back to the main menu of the form editor and open the “Preset donation amounts” tab. Here you can choose what contribution buttons appear on your form! Presetting contribution amounts will make it easy for your donors to quickly select an amount.
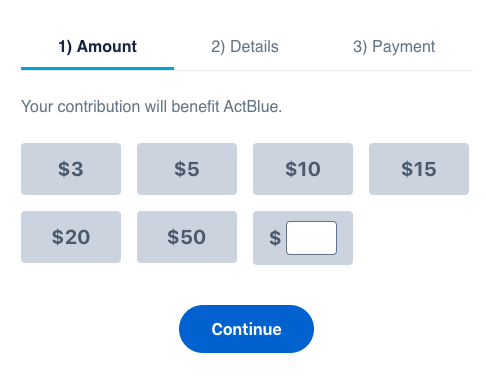
Donors will always have the option to type in their own amount, but it’s a good idea to make sure the amounts listed on the form make sense for the people you’ll ask to give.
3. Social share
Another great (and impactful!) feature you can customize is your form’s social share, which is the image and text that appear on Facebook and Twitter when someone posts the link to your form on social media. Keep image vetting and consent best practices in mind when choosing images for fundraising. Here’s an example:

To edit your form’s social share, open the “Social share and promote” tab in the form editor and fill in the fields. You can create reusable and default social share settings to save you time and effort in the future! Check out how to do that here.

If you update your social share settings but don’t see the change immediately, try clearing your Internet browser’s cache and cookies. You can typically find these settings in your Internet browser’s Preferences. Look for a section in Preferences that deals with clearing browser data, history, cookies, or your cache, and follow the directions there.
4. Recipients
You can also add multiple groups to your community form in the “Recipients” tab, which will turn it into a Tandem form. When a donor lands on a Tandem form, they can easily split one contribution between all of the groups listed on the form.
You can also change your form’s settings to ask donors after they’ve given whether they want to share their contact information with the recipient group(s) on the form. By default, when someone donates on a community form, their contact information is shared with every recipient group on the form. If you want to change this default setting, switch the “Show email list permissions pop-up?” setting at the bottom of the “Recipients” tab to “Yes.”

Changing this setting will show a pop-up box to donors that asks them to opt-in to share their information after they have donated. The pop-up looks something like this:
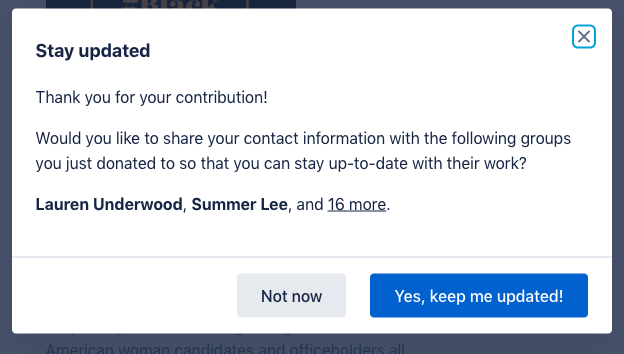
To preview your pop-up, click the “Preview permissions pop-up” button in the form editor.
Please note that community form creators always receive contact information for donors who give on their forms (regardless of whether they’ve chosen to share it with the recipient group[s]). However, form creators cannot see which donors opted in or out of sharing their contact information with the recipient group(s).
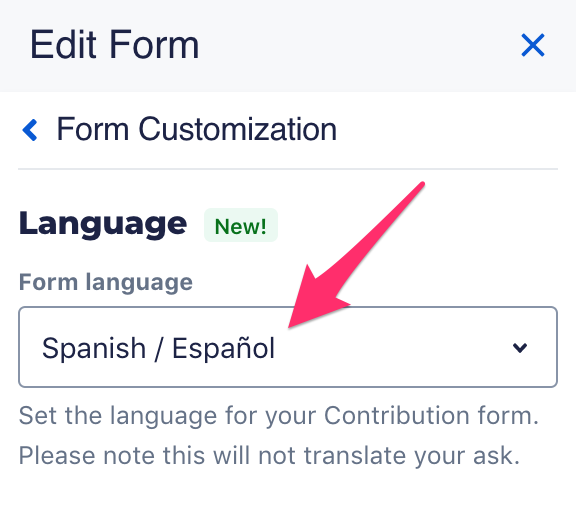
5. Form customization: Spanish language option
In the “ Form customization” tab, you can change all of the standard ActBlue-provided text on your form to Spanish with a single click! If you’ve already been writing your form title and ask in Spanish, you can create a user-friendly and unified form in one easy step.
Under “Language,” select “Spanish / Español” from the “Form language” dropdown to see the form translated in real-time.
Here’s what a sample community form looks like with the standard ActBlue-provided text translated:

To learn more about what is and is not translated with our Spanish language option, read this article!
Once you’re done making changes to your form, click the “Publish” button to save them!
Finding Your Community Form
To see your list of forms, login to your ActBlue account and click on “Fundraising” in the left navigation bar.
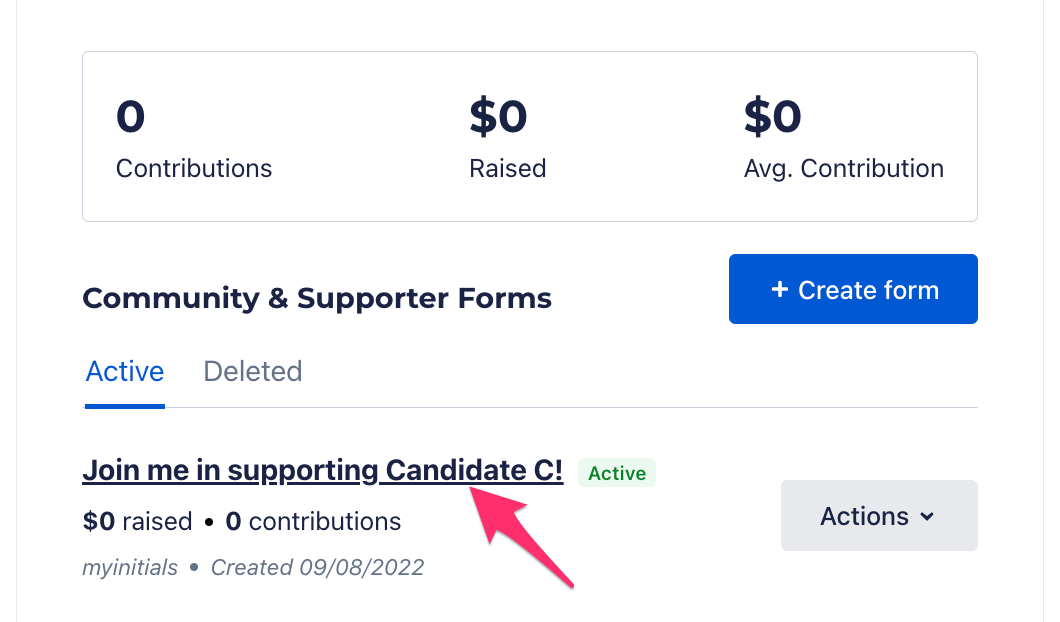
At the top, you will see the number of contributions, dollars raised, and average contribution size across all the contribution forms you have created. Next, you will see a list of all the contribution forms you have made, the dollars raised, and the number of contributions on each form. Click “Actions” to copy your form link, edit and preview your form, view your form’s statistics, duplicate your form, or delete it.

Fundraising With Your Community Form
After publishing your changes, close the form editor by clicking on the X in the upper right-hand corner. In the form navigation bar along the top of your form, click “Copy link” to share your form in an email, social media post, or anywhere else you’d like to fundraise.
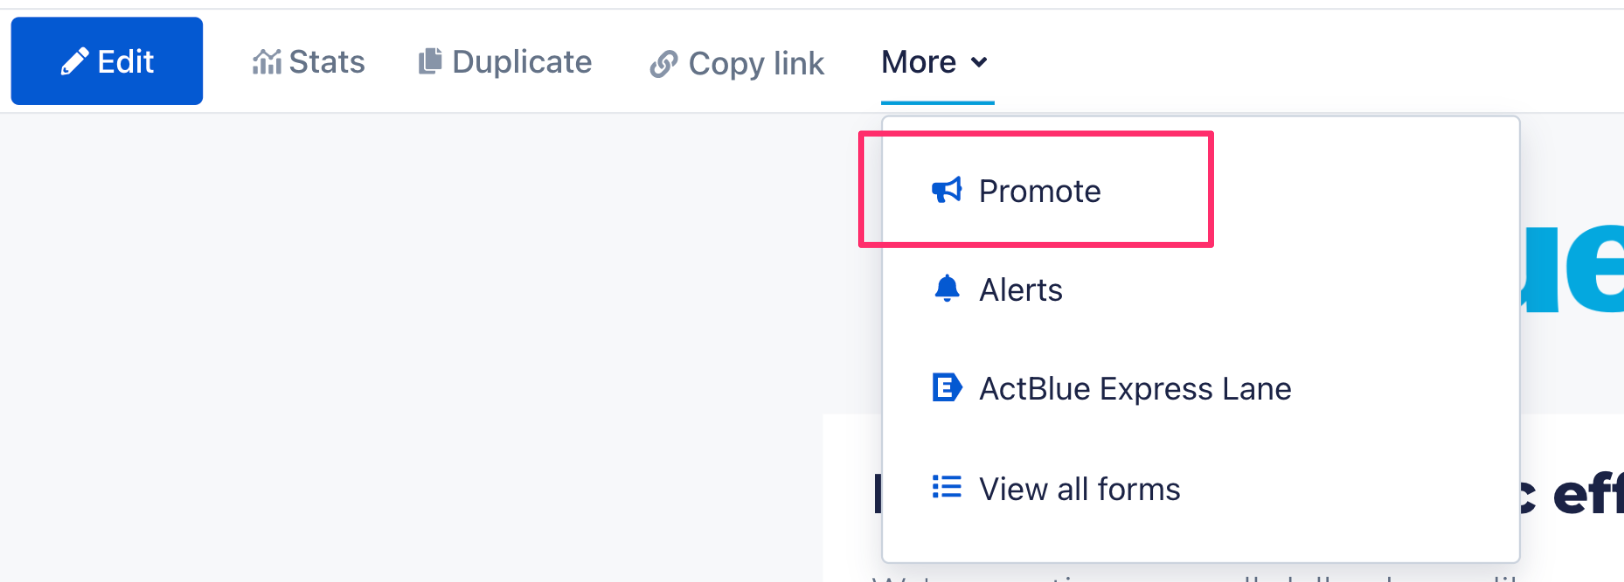
Click the “More” dropdown menu and then “Promote” for promotion options, such as refcodes.
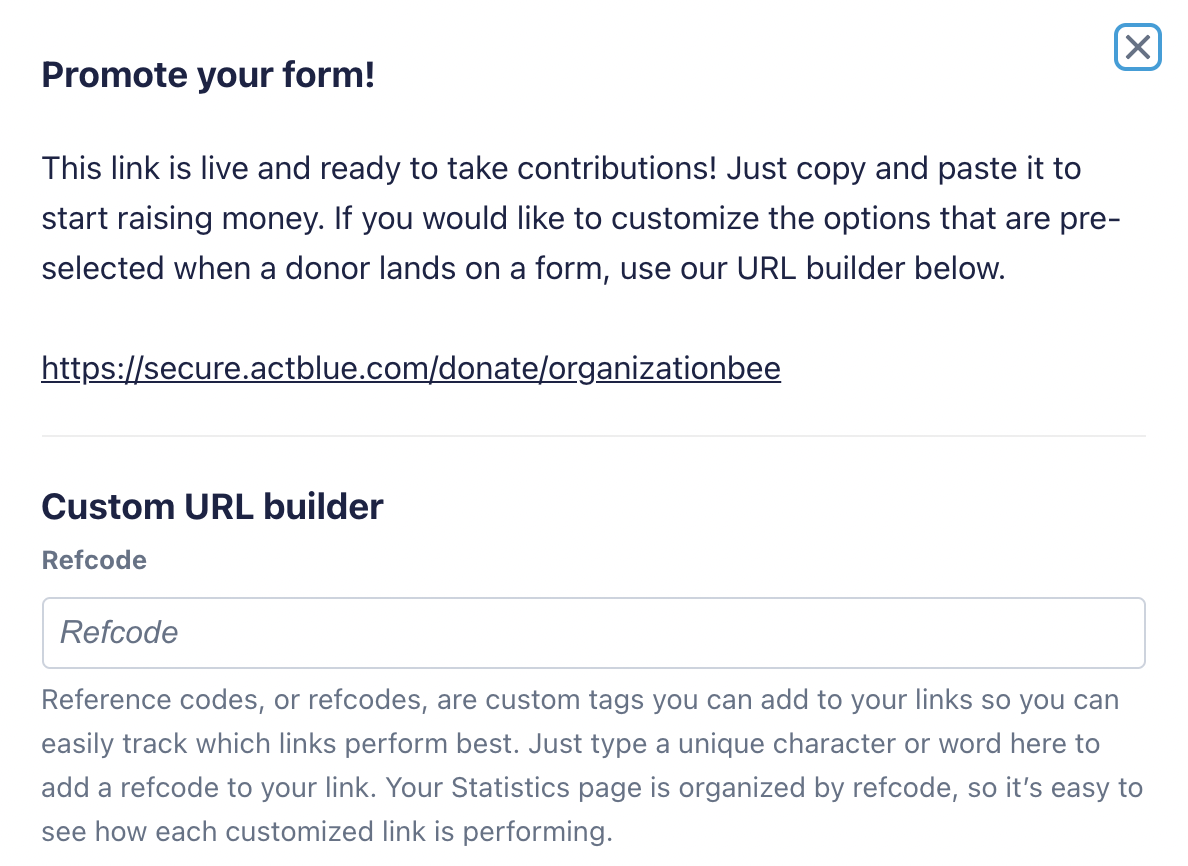
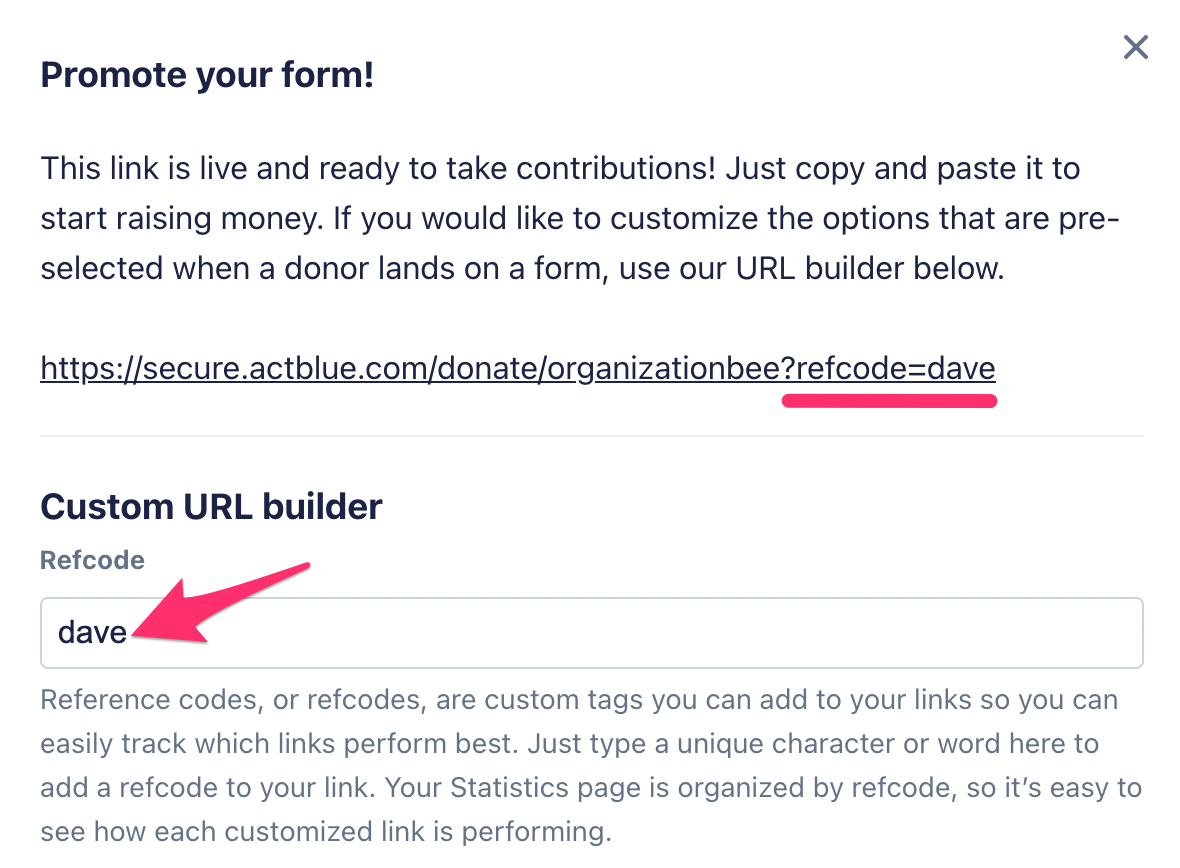
Refcodes are URL parameters you can add to your community form links to collect useful data about where your donations are coming from. Simply type a keyword into the “Refcode” box on this page, and a new link will be generated for your form in the pop-up. Then you can share that link like normal, but you can now track its performance on your form’s Statistics page.
You could create refcodes for tweets, Facebook posts, and your website to track which platform brings in the most contributions. You can also create refcodes for friends who share your form to track their progress, like in this example that uses the name “Dave” as a refcode:
If the group you are fundraising for on your community form has contacted ActBlue and been approved to use pre-set recurring forms, you will also see a “Recurring” field in the Promote pop-up. Pre-set recurring forms allow you to direct people ready to make a monthly donation to a form with the recurring option pre-selected. Please note that ActBlue has a policy that requires fundraisers using pre-set recurring forms to explicitly ask donors for recurring contributions immediately before the donor clicks the link to give. Read the full pre-set recurring forms policy and get helpful language examples here.
Your Fundraising Statistics
Login to your ActBlue account and select “Fundraising” from the left navigation bar.
To access the Statistics page from your account’s Fundraising page, click on the title of your form.
On this page, you’ll find detailed information on your form’s performance, beginning with a bar graph that shows how your form has done in the past seven days. You can customize the time frame using the dropdown in the top right corner of the graph.

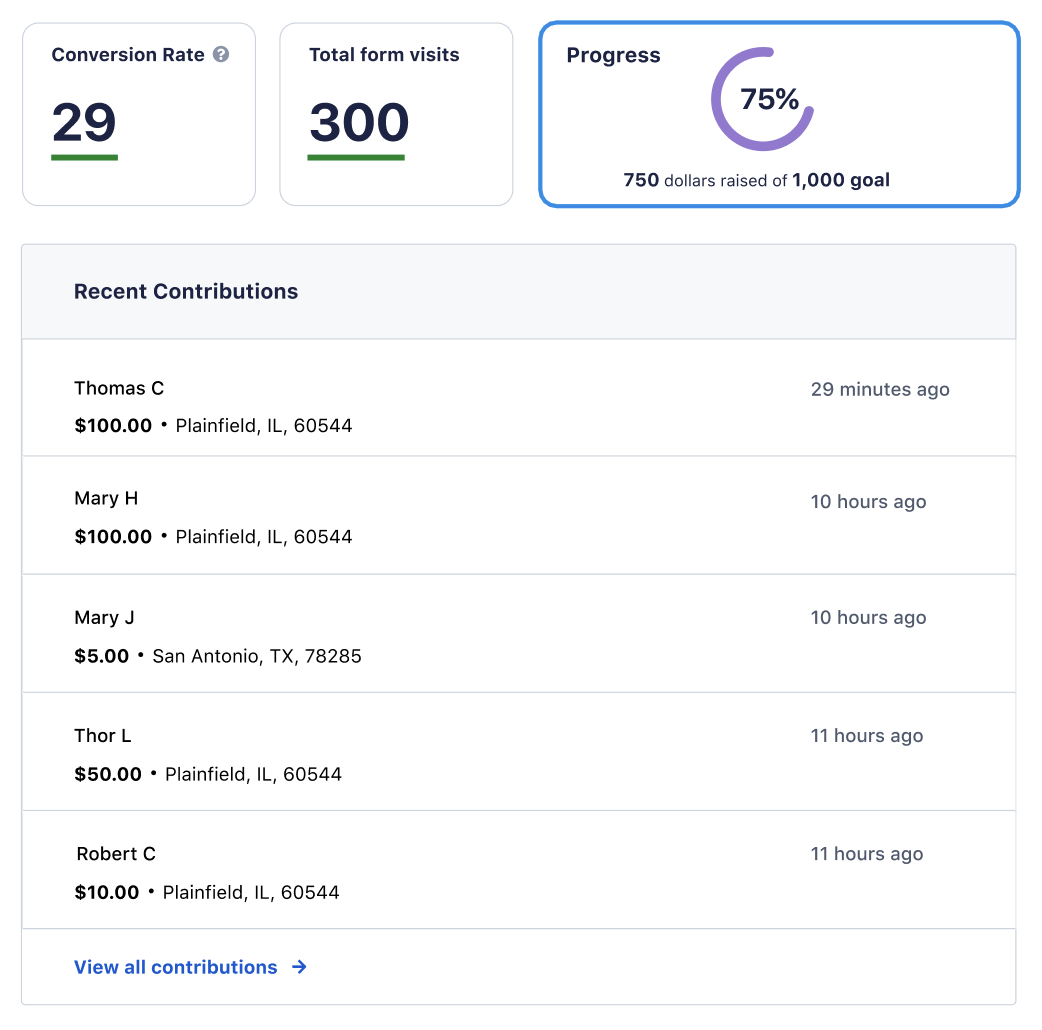
Next are a series of modules that dive deeper into your fundraising numbers.
- Conversion Rate: The number of conversions divided by the total number of visitors to your form. For example, if your form receives 200 visitors in a month and has 50 donations, the conversion rate would be 50 divided by 200, or 25%.
- Total form visits: The total number of people who visited your form.
- Progress: Your progress toward your goal. If you haven’t set a goal, you will see a prompt to do so.
Next is a list of the most recent form contributions. Click “View all contributions” to see the full list or download a report.
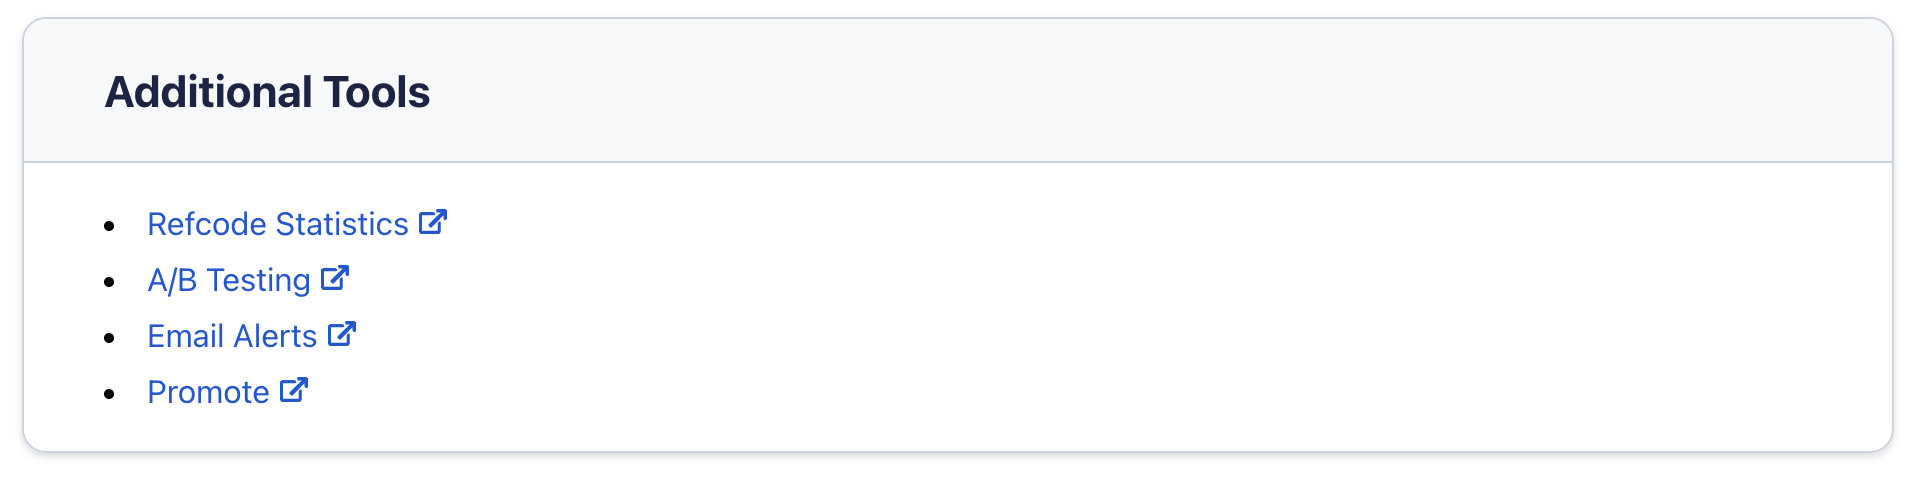
The last module has links to additional tools including Refcode Statistics, A/B Testing, Email Alerts, and Promote.
Downloading Community Form data
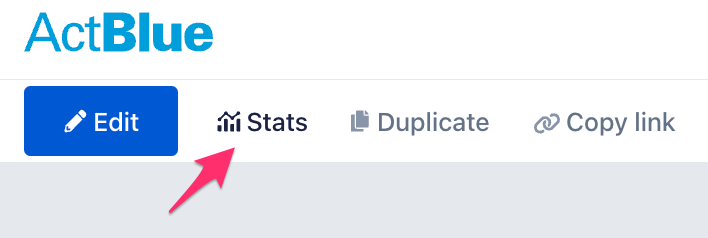
To download data on your form, enter your form editor. You can do this from your Fundraising page. Go to the form you’d like data on, click the dropdown menu, and select “Edit and Preview.” Once in your form editor, click “Stats” at the top of the page.
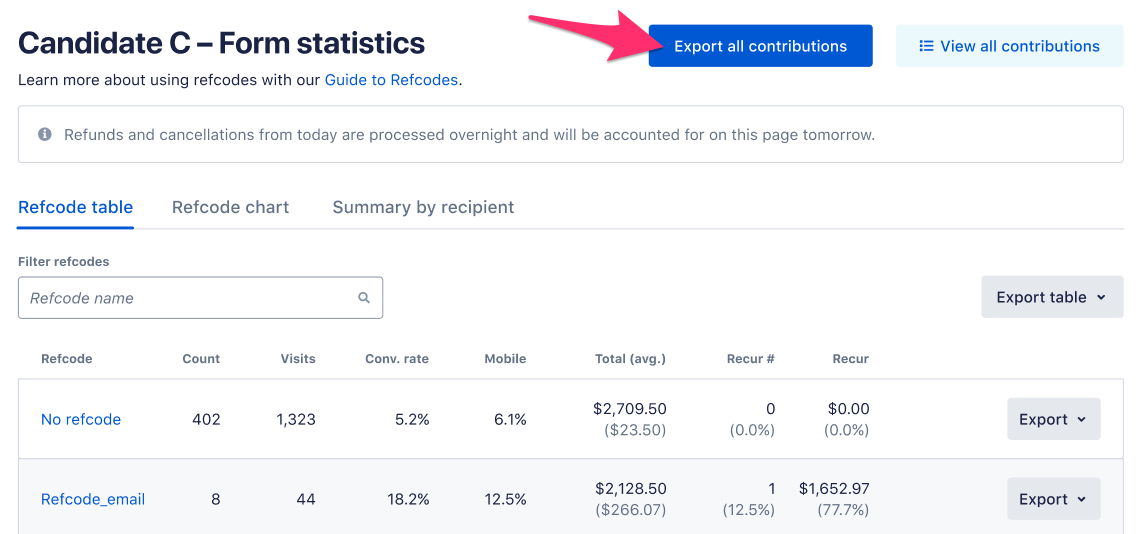
On the form’s Statistics page, you’ll find a table of statistics on how your form performed, organized by refcodes. Here are the statistics you can see in the Refcode table tab:
- Contributions: Number of contributions made
- Visits: Number of people who landed on your form
- Conversion Rate: Percent of people who landed on your form who donated (count divided by visits)
- Mobile: Percent of contributions made on mobile devices
- Total (avg.): Total dollars raised, followed by the average contribution size in parentheses
- Recur #: Number of recurring contributions made, followed by the percent of contributions made that are recurring contributions in parentheses
- Recur: Total dollars raised from recurring contributions
Select “Export all contributions” in the top right to download a file with all donor data (including names and email addresses) for all of your contributions.
Additional Reading
How can I fundraise for my favorite candidate or organization?
Grassroots supporters who want to fundraise on behalf of their favorite campaigns and organizations on ActBlue have two options: community forms or supporter forms! Anyone can create a community…
How can I keep track of my contribution forms?
In this article: View and Manage Your Contribution Forms To view all of your contribution forms in one place, login to your ActBlue account, select “Fundraising” from the left…
Can I fundraise for more than one candidate or group using the same contribution form?
Yes, if you want to set up one contribution form for multiple candidates or groups, you can use our Tandem Fundraising feature. Creating a Tandem form is easy: simply…