Brandings
In this article:
- The basics
- Creating reusable and default brandings
- Additional customizations
- For advanced users only: Custom CSS
- Creating branded email receipts
- Create a supporter form using your branding
Brandings are custom designs for your contribution forms and receipts. Creating and using brandings ensures your campaign or organization’s imagery, style, and brand colors are present in every step of the donation process. A good branding will make your contribution form stand out to supporters and can add credibility and professionalism to your work!
Creating a form branding on ActBlue is simple no matter your design skill level: We make it easy to customize dozens of pieces of your contribution form, from the background color down to the font on your donation buttons — no custom CSS required! Our form editor previews your changes in real time, so you can be sure your branding will look exactly as you intend. And you can even create reusable and default brandings to save you time and effort in the future!
In this comprehensive guide, we’ll cover the basics of contribution form brandings, reusable and default form brandings, additional customizations, custom CSS (for advanced users only), and branded email receipts.
The Basics
You can create a new branding in the first few steps of creating a contribution form. From your dashboard, click “Create Form.”
Fill out the basics of your form and click “Next step.”
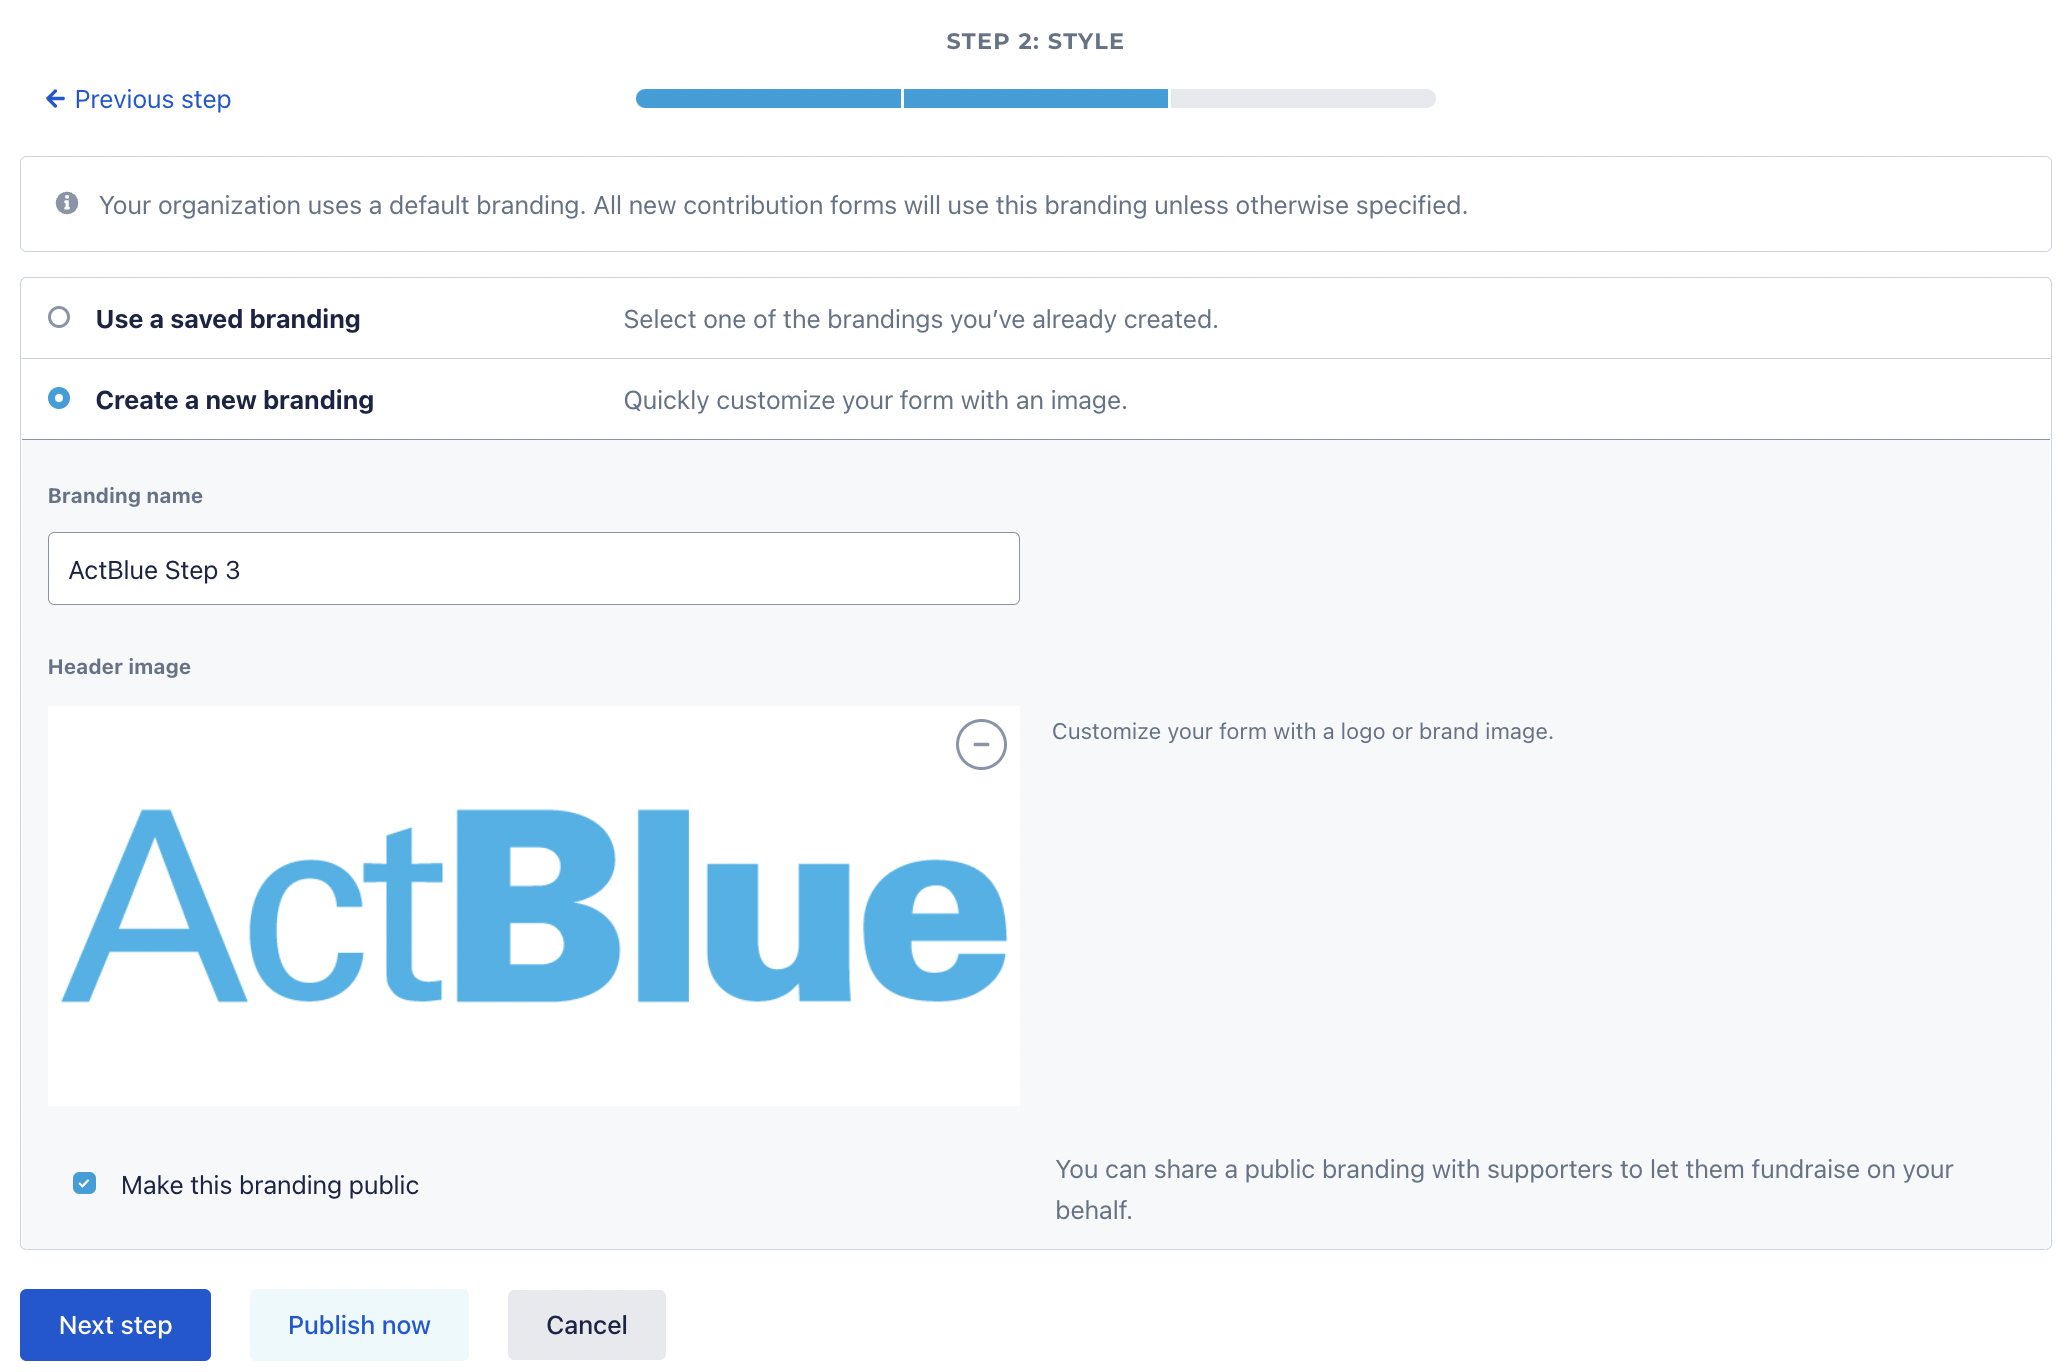
In the Style page, click “Create a new branding.” Give your branding a name and add a header image, such as a logo. You can also choose to “Make this branding public,” so that supporters can use it to create forms on your behalf.
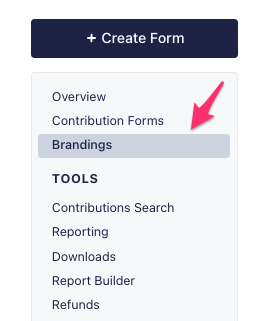
You will now be able to find this branding by clicking on the “Brandings” tab from your Dashboard toolbar.
You can also create a branding by navigating to a particular contribution form in the form editor. Find the form in the “Contribution Forms” tab of your Dashboard, open its form editor, and go to the “Branding” tab.


This will bring you to the branding editor:

If your contribution form does not have a saved branding, “[Custom]” will be selected in the “Form branding” dropdown. You can easily pick one of your reusable brandings to apply to your form from this dropdown:

If you want to create a new branding (either reusable or custom), select “[Custom]” and use the branding editor to design your branding.
We recommend keeping your branding clean and simple. For beginners, just updating your header image and background color is a great start! It’s important to not go overboard customizing your form branding. Too many colors or images can be distracting and deter people from actually donating!
If you’re looking to make a more advanced branding, there are many design elements in the branding editor to consider customizing, so we recommend going into each tab and trying out some of the different customizations without publishing your changes. This way you can get familiar with everything you can customize! Your form preview will automatically update whenever you make a change, so it’s easy to see everything you can do.
Here are some design terms you’ll see throughout the branding editor:
- Padding: The amount of space around the content of an element. “Content” can refer to text, an image, or something else.
- Border: The outer boundaries of an element. All elements inherently have borders. In the “Branding” menu tabs, you can customize borders with different styles and colors. When you customize a border, the design will appear within the boundaries of the element — it will not add a design outside/around the element or change the spacing within the element. If you customize an element’s border and think the spacing of the element should also be changed, you can customize the padding.
- Border radius: The amount of rounding applied to the corners of an element. A border radius of 0 will result in sharp, 90 degree corners. You do not need a customized border to set a border radius: Elements with and without customized borders can have rounded or sharp corners.
And here is a color picker you’ll see throughout the branding editor:

- A hex color code is a series of numbers and letters (#XXXXXX) that specifies an exact color. We recommend using the specific hex color codes for your brand colors in your form brandings. This will make sure your forms match the rest of your online presence and look professional! If you don’t know your hex color codes, you can use the circular color pickers in the top two sections to select a shade that looks like one of your commonly used colors.
- The color picker also includes RGBA color values. These values determine the transparency of a color. Use the circular color picker in the transparency bar to change your RGBA values.
The first thing you should do when making a contribution form branding is customize your background and create a header. Go to “Background” in the branding editor to pick a color for your background and/or set a background image.
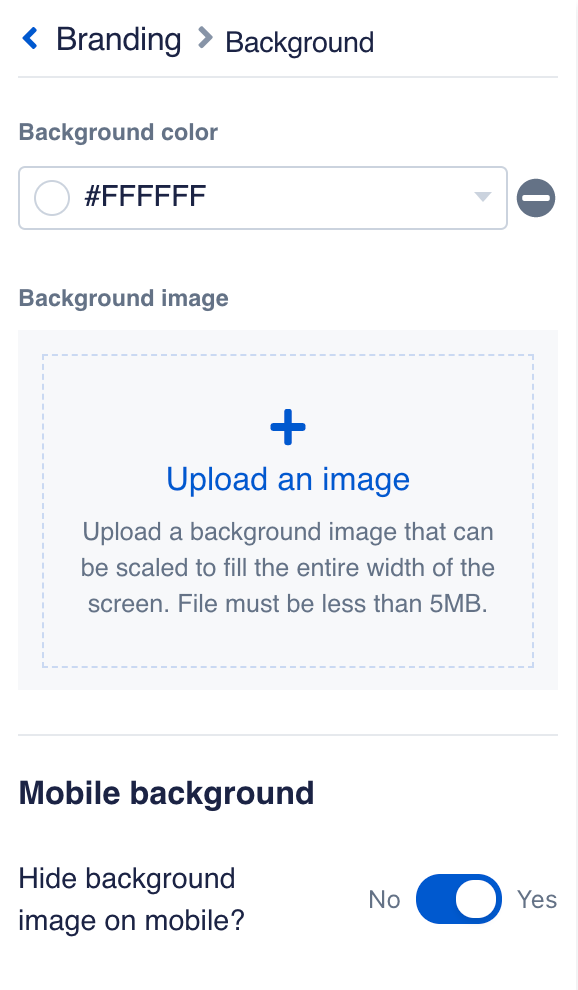
You should choose a color that will keep your form consistent with the rest of your web presence or website. If you know the hex color code for one of your group’s commonly used colors, you can type it in the “Background color” field.

If you upload an image for your background, you’ll have multiple options for the image size, position, and repetition on your form. We also give you the option to hide the background image on mobile if you think it will be too distracting on a small screen.
After you’ve set your background, go back to the branding editor and click “Header.” Here you can customize your form header with an image. A good header image is usually a logo or similar image. It is not the spot for a photo of a candidate or a large image (a background image would be better for that). When picking images to use in your fundraising, keep image vetting and consent best practices in mind.
Once you add a header image, you can customize your header click-through link (links must use “https://”) and background colors (the “Header block” and “Header inner block” fields). You can also create different header settings for desktop and mobile. Please note: If you do not use a mobile header image, no header will appear on mobile, even if you’ve customized the header block and header inner block.
Once you’re happy with your branding, just click the green “Publish” button at the top of the form editor to make your changes live (this will also publish any other edits you’ve made in the form editor).

Creating Reusable and Default Brandings
If you want your branding to be reusable, go to “Save options” at the bottom of the branding editor.

Toggle the “Make branding reusable” button to “Yes.” Then give the branding a name before publishing your changes.

The next time you go to the “Branding” tab of the form editor for one of your contribution forms, the “Form branding” dropdown will list all of the reusable brandings you can use!
If you do not name your branding before publishing, it will be custom to that form, not reusable (you will have to customize brandings again on other forms). However, if you clone a form with a custom branding, that custom branding will be duplicated on the new form.
If needed, you can edit reusable brandings. Just select the branding you want to edit from the “Form branding” dropdown and click the blue “Edit” button.

The branding editor will open, and you’ll be able to edit and preview the branding just like when you created it. Please note that when you’re done editing a reusable branding, clicking the “Save” button will make your changes live across all forms currently using that branding. Unlike making most other changes in the form editor, you will not need to click the “Publish” button for changes to your reusable branding to go live.
You’ll receive a warning that all forms using that branding will be updated after clicking “Save.”


In addition to creating reusable brandings, you can also designate a default branding for your campaign or organization. You can set a default by going to “Save options” and toggling the “Set as default” button to “Yes” before publishing your changes.
From then on, all brand-new forms you create will automatically have the default branding applied, except for new clones of forms that use a different branding. This means you won’t have to worry about setting up a branding for new forms in the future!
If at any time you select a different reusable branding to be your default, it will only be applied to brand-new future forms, not pre-existing forms that use an old default or new clones of forms that use a different branding.
Lastly, you can choose to make your reusable branding public to users outside of your campaign or organization. Some ActBlue donors choose to go that extra step and make their own contribution forms to fundraise for specific candidates or causes they support. If you go to “Save options” and make your branding public, supporters will be able to use that branding on forms that benefit your group. To find the forms supporters have made using your public branding, head to the “Contribution Forms” tab of your dashboard, and select the “Managed by supporters” tab.

Custom contribution form brandings give you big impact for only a little effort. We highly encourage you to take a few minutes to create reusable and default brandings to make your contribution forms as polished and recognizable as possible!
Additional Customizations
If you need to customize more than your header and background, here’s everything else you can do in the branding editor. You have control over practically every aspect of a contribution form, but keep in mind that it’s best to keep it simple. Your design should always keep the focus on donating, rather than flashy images, design, or text.
- Body blocks: Change the overall layout of your form by picking a side-by-side or stacked layout. This tab also includes more block elements of your form that you can customize with colors, padding, and borders.
- Donation and ask blocks: Customize the background colors, padding, and borders of some of the most important elements of your contribution form: The ask block (where your message to potential donors goes) and the donation block (where supporters will actually fill out their payment information and click buttons to donate). The “Full content block” is the container that surrounds both the ask block and donation block.
- Donation block elements*: Customize detailed elements of your donation block here — the donor information fields, the donor block headings, and the steps at the top of the donor block.
- Ask block elements: Customize the font in your ask block. Make sure your font is legible and does not clash with your donation and ask block customizations!
- Action buttons*: Customize the fonts, background colors, and borders for buttons that prompt an action when clicked. Actions include advancing to the next step of the donation process or, for ActBlue Express users, donating immediately.
- Selectable buttons*: Customize the fonts, background colors, and borders for buttons that enable a user to select an option, but do not move the user forward in the donation process. Examples of selectable buttons include non-ActBlue Express dollar amount buttons or the “Make it monthly” options.
- Contribution rules: Customize the color, padding, and border options for the contribution rules block, as well as the color of its text. Please note: Contribution rules must remain legible on your form. ActBlue reserves the right to remove your custom branding if contribution rules are illegible.
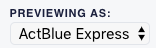
* Your form preview settings will affect which donation block elements, action buttons, and selectable buttons you see while making your customizations. To make sure you are aware of every element you’re customizing, change the form preview by using the “Previewing As:” dropdown in the top right corner of your screen.
Once you’re happy with your branding, click the green “Publish” button at the top of the form editor to make your changes live!
For Advanced Users Only: Custom CSS
We’ve made customizing brandings in the form editor really easy so campaign and organization admins don’t have to worry about using complicated custom CSS in brandings. This also helps ensure contribution forms load as quickly as possible. If you must use custom CSS in a branding, you can add it under “Advanced” in the branding editor. This is also where you can add a custom font kit. We recommend only adding one kit to avoid slowing down your page load time.

With the launch of the branding editor, some HTML elements in brandings were rearranged and some class names were changed, so you’ll have to use your browser’s development tools to find the new class names. We strongly recommend only styling classes that begin with “CSTM” as these are least likely to change in the future.
Please note that in extreme cases, when updates to contribution forms are rolled out, custom CSS in brandings could prevent your donors from contributing, so you should only use it when absolutely necessary. Our team will be limited in their ability to support custom CSS branding issues.
Creating Branded Email Receipts
We also give you the tools to brand the email receipts your donors receive after they give. To customize these receipts, go to the “Brandings” tab in your Dashboard menu. There you’ll find a list of all the brandings you’ve created, as well as the forms they’re being used on.

A branded email receipt must be created within an existing contribution form branding. Click “Edit” next to the form branding that you want to have branded email receipts. Then you can designate a hex color code for your background color and upload a header image for your email receipts.
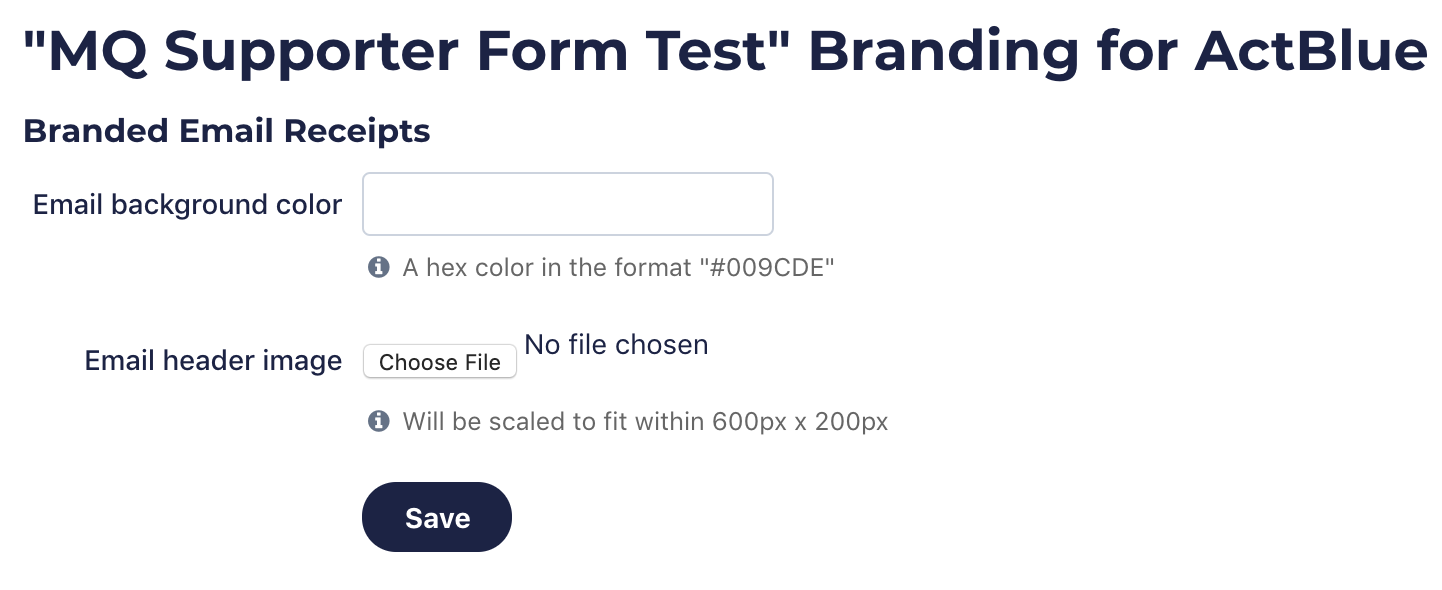
Click “Save” to add the branded email receipt to that branding. After that, whenever someone donates on a form that uses that branding, they’ll receive your branded email receipt.
Here is an example of what a branded receipt may look like:

Create a Supporter Form Using Your Branding
In the Brandings tab of your Dashboard toolbar, you can also share a link with your supporters so they can fundraise on your behalf. Click “Share” next to the form branding. Copy the link on the following screen to send your supporters to a landing page where they can create their own version of a contribution form that uses your branding!
 You can even set up a custom title and donation ask on your supporter forms so your volunteers don’t have to! Learn more about creating and personalizing supporter forms here.
If you want some assistance setting up a branded form or receipt, feel free to contact us at support@actblue.com!
Additional Reading
Image Vetting and Consenting
In this article: Why is proper image use important? Best Practices: Sourcing images for fundraising Why is proper image use important? Images create a more personal, personable online presence,…
Creating & Customizing Contribution Forms
<br /> ActBlue user roles and permissions dictate what users can do on our platform. If the tools or features in this article are unavailable to you, speak to…
Creating Default Settings
Defaults allow you to keep your settings consistent across all of your contribution forms and save you lots of time and effort in the future! We’ve made it easy to take…
Using the Form Editor
ActBlue user roles and permissions dictate what users can do on our platform. If the tools or features in this article are unavailable to you, speak to your entity…